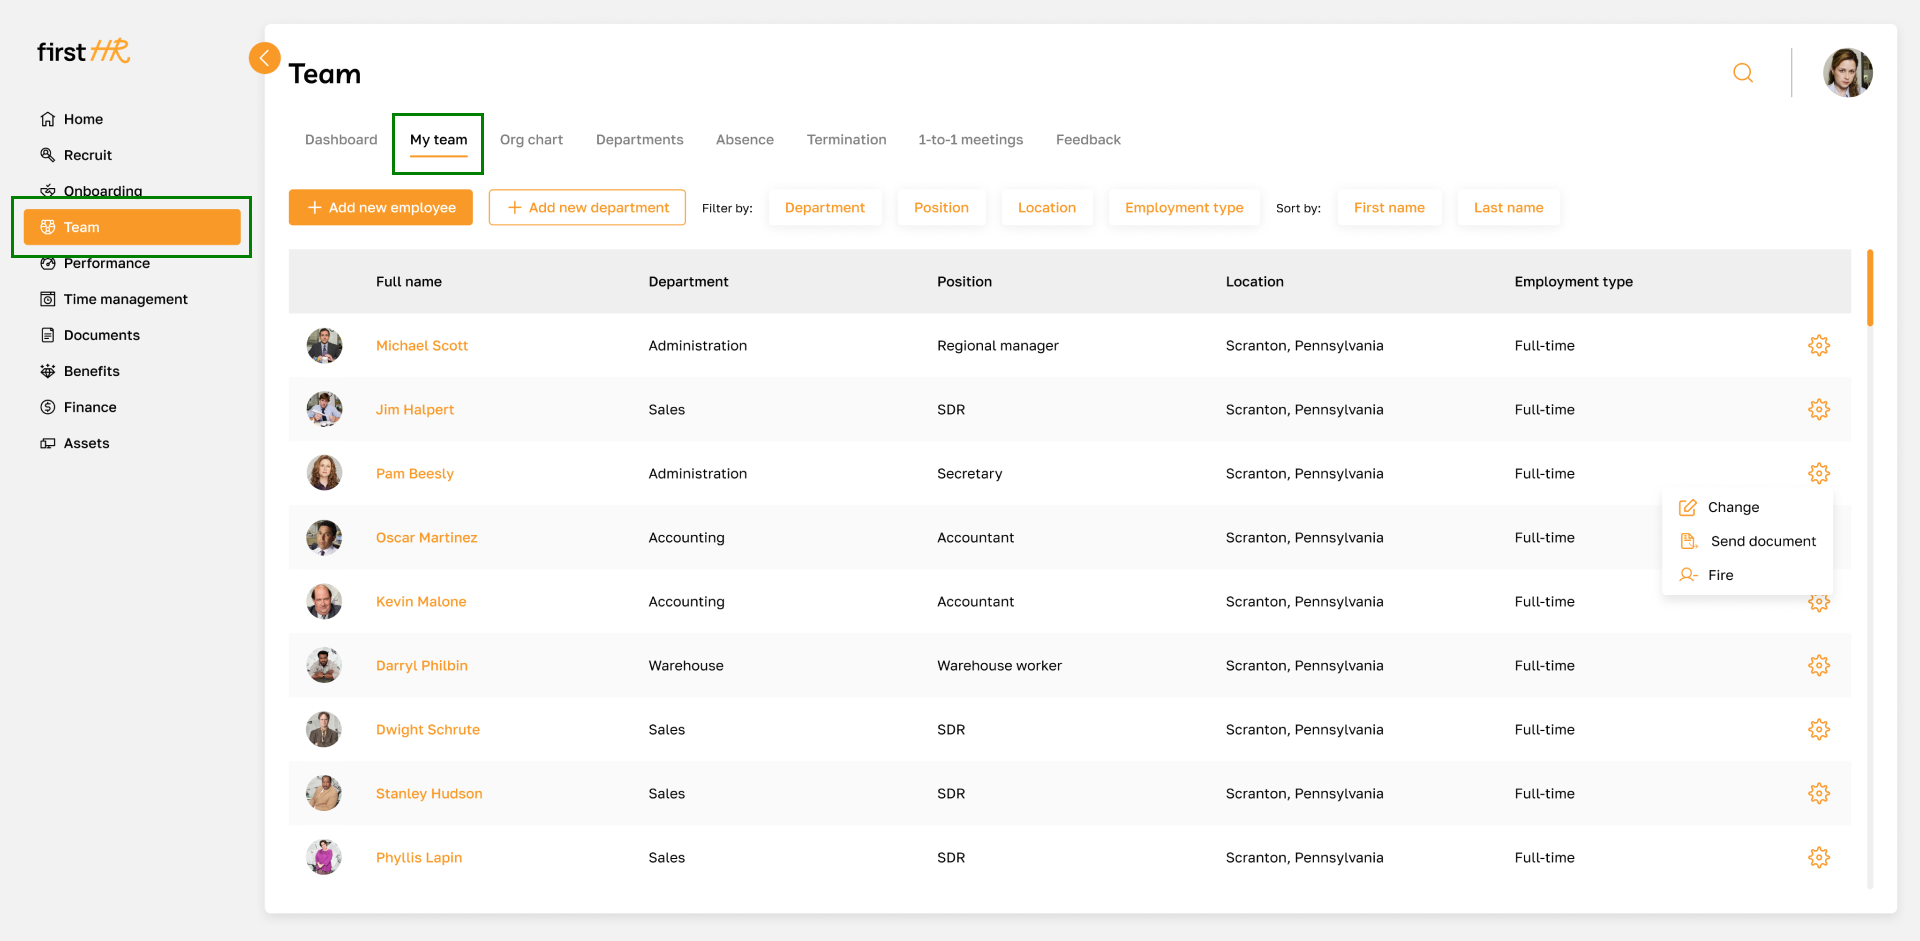
My Team: Overview
Section description
The "My Team" subsection within the Team section offers a centralized view and management capabilities for the organization's employees. This subsection is designed to streamline the administration of employee records, departmental structure, and employment types, providing a user-friendly interface for admins.
The "My Team" subsection includes the following key features:
- Viewing the Employee List: Navigate to the "My Team" tab to see a list of all employees, filter by various criteria, and sort by name.
- Adding New Employees and Departments: Use the buttons at the top of the subsection to add new employees or departments.
- Managing Employee Actions: Click the gear icon next to an employee's name to change their details, send documents, or terminate their employment.
This structured approach ensures that admins can efficiently manage their teams, maintain accurate records, and support organizational needs.
Features List
- Viewing the Employee List
- Adding a New Employee
- Adding a New department
- Changing employee's information
- Sending a document for signature
- Dismissal of an employee
Feature Overview
Employee List
- Displays a comprehensive list of all employees with details such as full name, department, position, location, and employment type.
- Provides search and filtering options by department, position, location, and employment type.
- Allows sorting by first name or last name for easy navigation.

Adding a New Employee
The process for adding a new employee is described in this article.
Adding a New Department
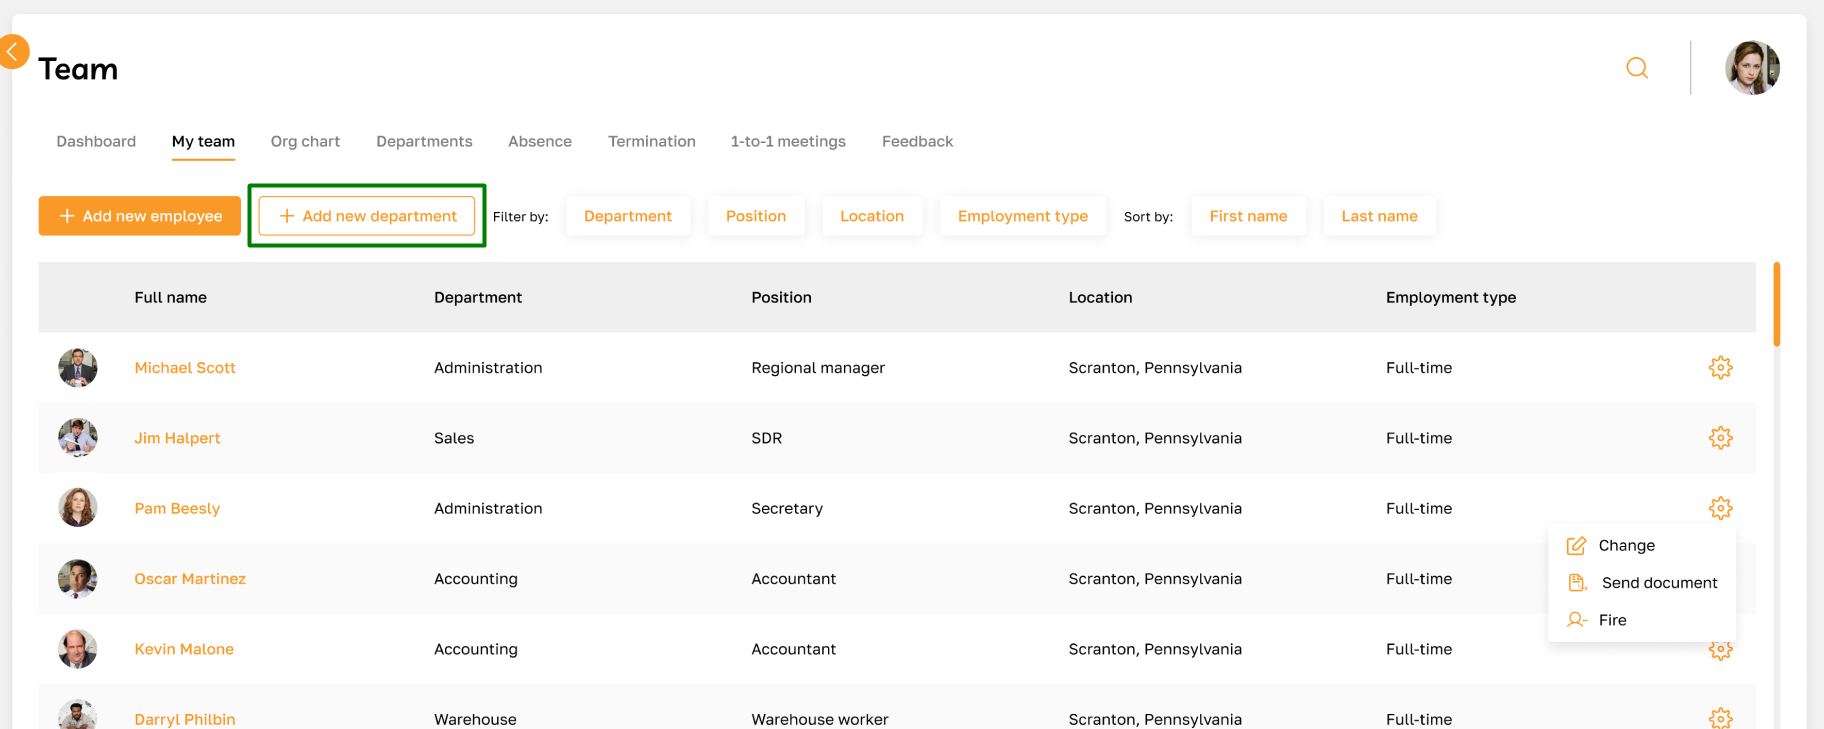
Click the "Add department" button to add a new department.
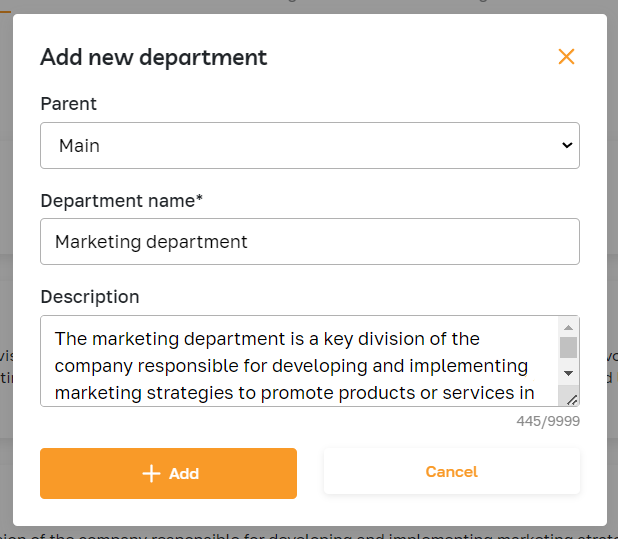
In the pop-up window that opens, specify the parent department, name, and department description, then save the changes. The new department will appear in the Department's subsection.
Changing employee's information
To edit an employee's information, go to their profile. Click the gear icon and select the edit option, or simply click on the employee's name.
For more details on editing profiles, please read this article.

Sending a document for signature
The admin can send a document to an employee for signing by choosing it from the device. To send a document for signature, click on the gear icon in the employee's row and select the send option.
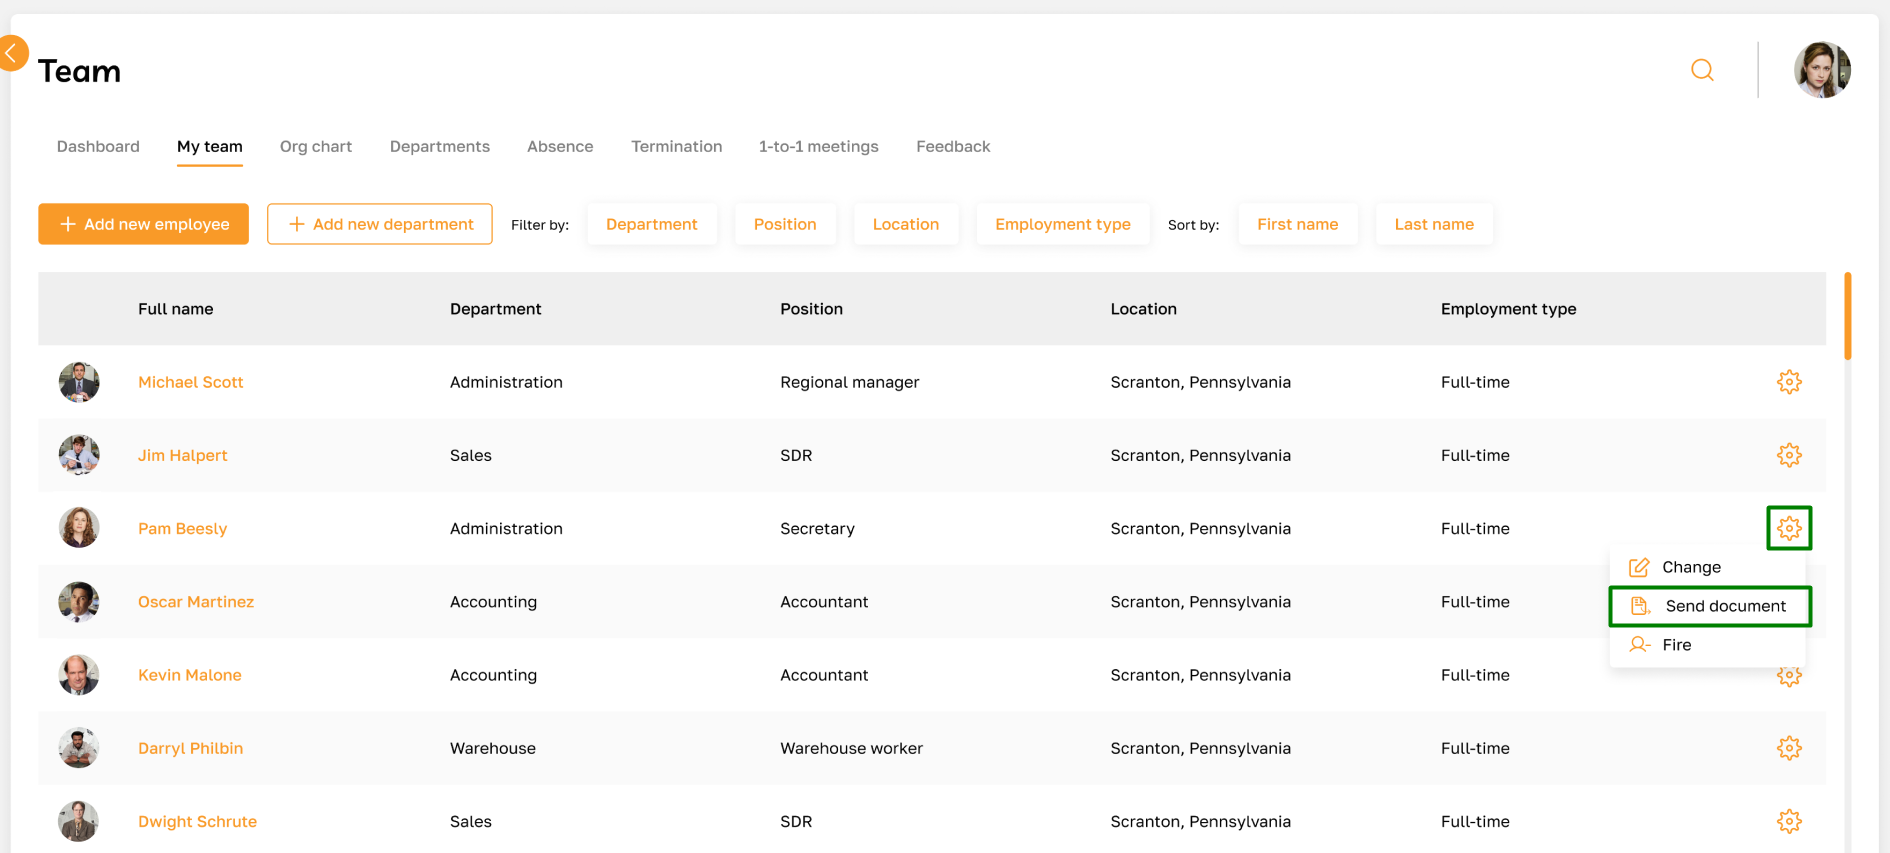
In the opened window, fill in the required fields and confirm the submission.
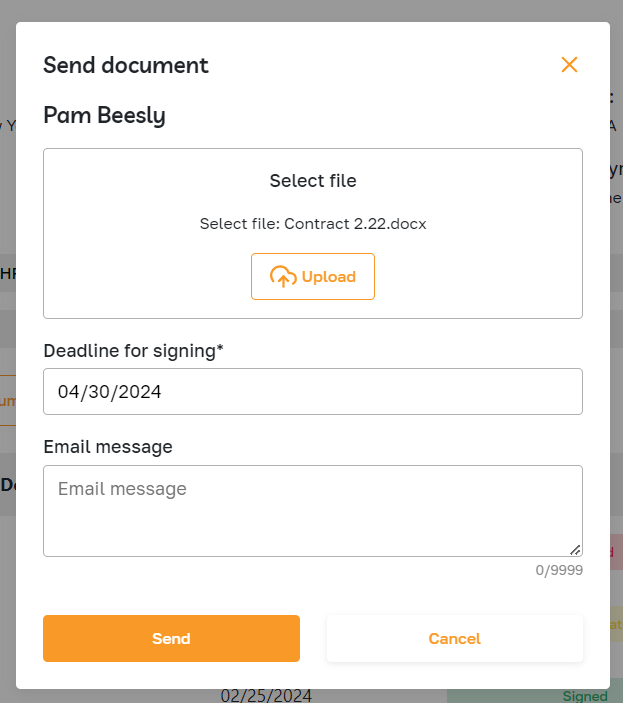
After sending the documents for signature, the admin can control the document workflow through the employee's profile or the Documents section.
The documents will be sent to recipients via email. Additionally, employees will be able to sign the document through their account.
The system will remind you and the document recipients when the signing deadline approaches.
Dismissal of an employee
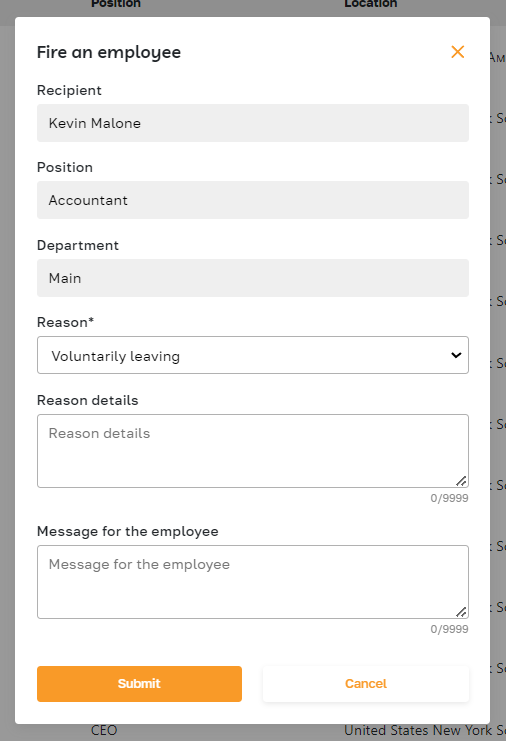
To terminate an employee, click on the highlighted icon in the employee's row and select the termination option.
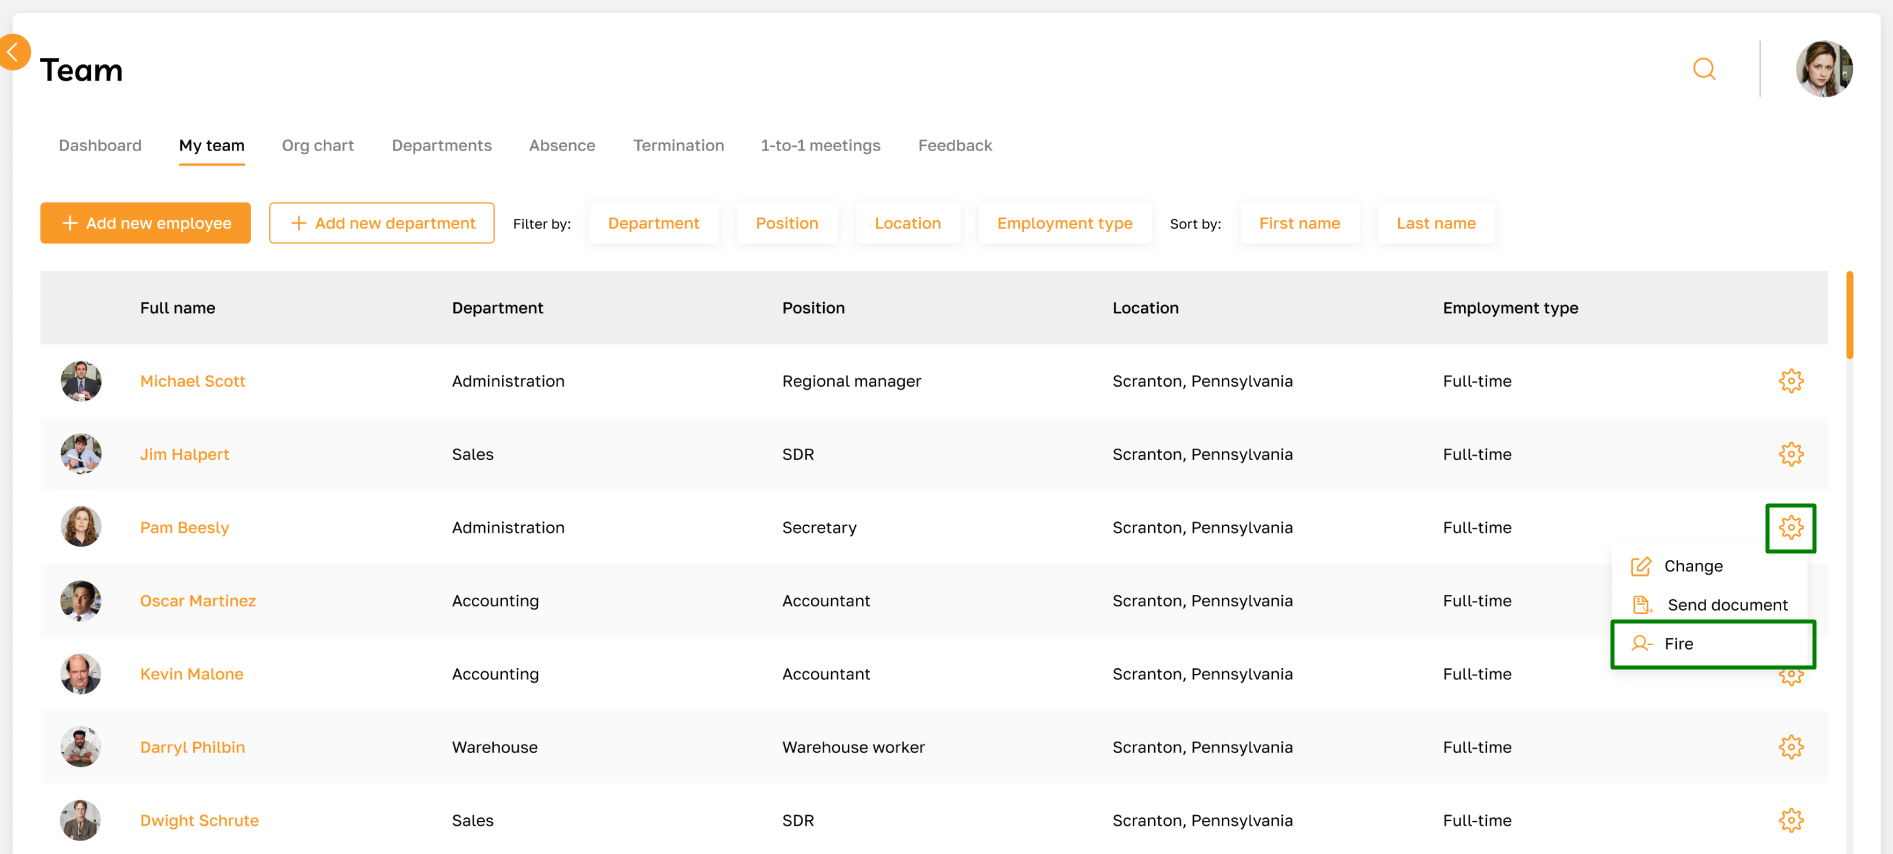
In the opened pop-up, specify the reasons for termination, details, and the message for the employee.
After termination, the employee will receive an email notification, their access to the account will be blocked, and their profile will be moved to the "Terminated" subsection.
