Applicant Tracking: Overview
Section description
This section within the Recruit module empowers admins to manage candidate selection for job vacancies efficiently. Here, admins can:
- Delete, edit, or archive job postings.
- Create a new pipeline to link an already published vacancy to an external resource.
- Configure ATS (manage applicant tracking templates, custom tests, and interview evaluations).
- Manage selection stages within each job vacancy (add, edit, or remove stages).
- Add new candidates.
- Manage candidates (move them between stages, compare, edit, move between vacancies, disqualify, communicate, and save to the candidate database).
Features list
- Viewing Job Details
- Deleting Job Postings
- Archiving Job Postings
- Creating a New Pipeline
- ATS Settings
- Pipeline Overview
- Connecting Pipeline to Vacancy
- Adding a New Stage
- Editing and Deleting Stages
- Adding a New Candidate
- Candidate Profile Overview
- Communicating with candidate
- Reviewing Candidate Profile Tabs
Feature Overview
Viewing Job Details
On the subsection's main page, there is a list of active vacancies. To get detailed information about a specific vacancy, click the highlighted icon and select the corresponding option from the list.

In this window, admins can view the vacancy details and make any necessary changes.
Deleting Job Postings
When a job position is no longer relevant or needs to be removed from the platform, users can delete the vacancy. This action permanently removes the job posting from the system, ensuring it is no longer visible to candidates or other users. The deleted vacancy will be moved to the Job Posting subsection.
To delete a vacancy, click the highlighted icon in the active vacancy row and select the corresponding option from the list.

Archiving Job Postings
Instead of permanently deleting a job posting, users can choose to archive it. Archiving allows users to retain a vacancy record for reference purposes while removing it from active circulation. Archived vacancies can be accessed later if needed but are not visible to candidates. The archived vacancy will be moved to the Job Posting subsection.
To archive a vacancy, click the highlighted icon in the active vacancy row and select the corresponding option from the list.

Creating a New Pipeline
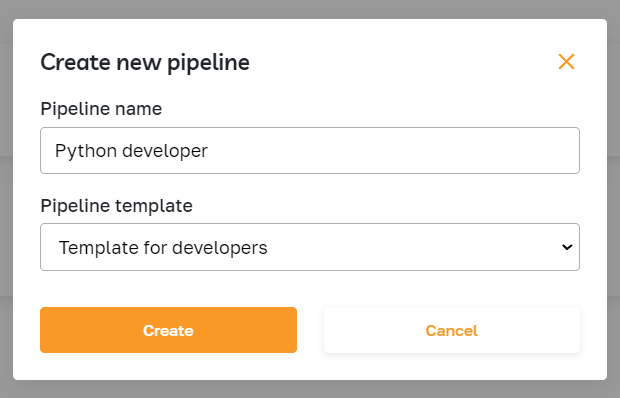
To add a new pipeline, click on the corresponding button.

Enter a name, such as the job title, and select an applicant tracking template.
The new pipeline will be added to the list. The admin can now link the pipeline to a published vacancy and add candidates.
ATS Settings
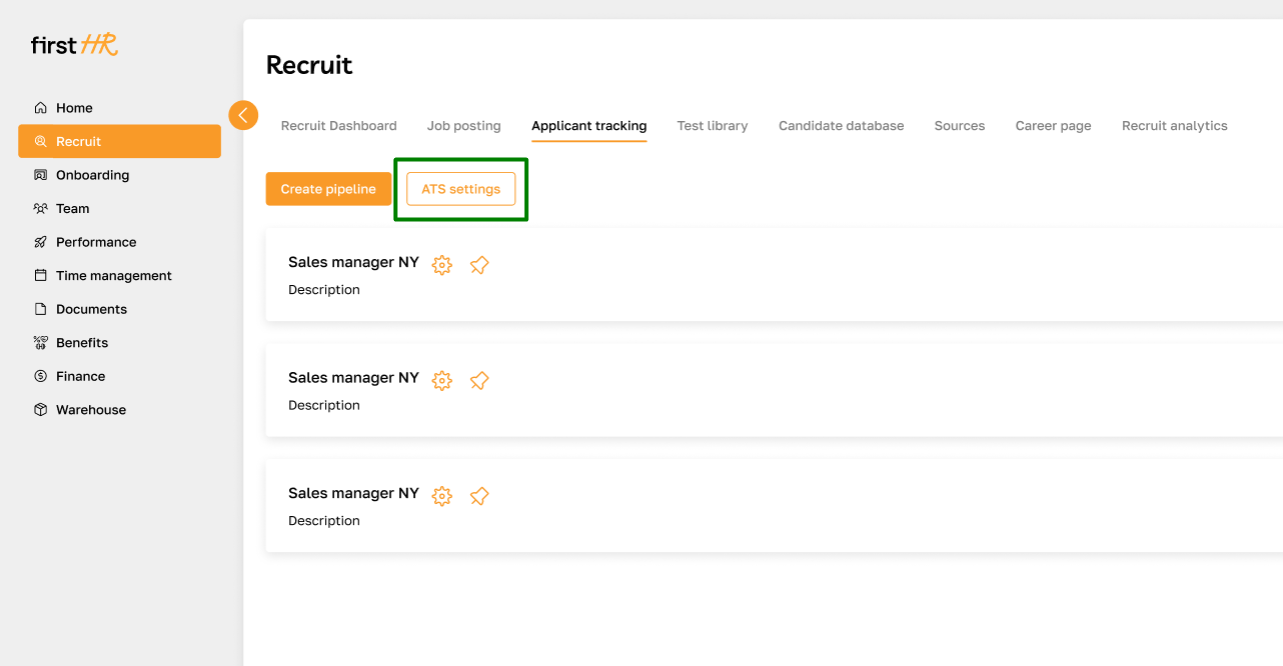
Click on the respective button to access the ATS settings. Here, the admin can manage Applicant Tracking Templates, Custom Test Evaluations, and Interview Evaluations.
Please refer to this article for detailed information on creating and managing templates.
Pipeline Overview
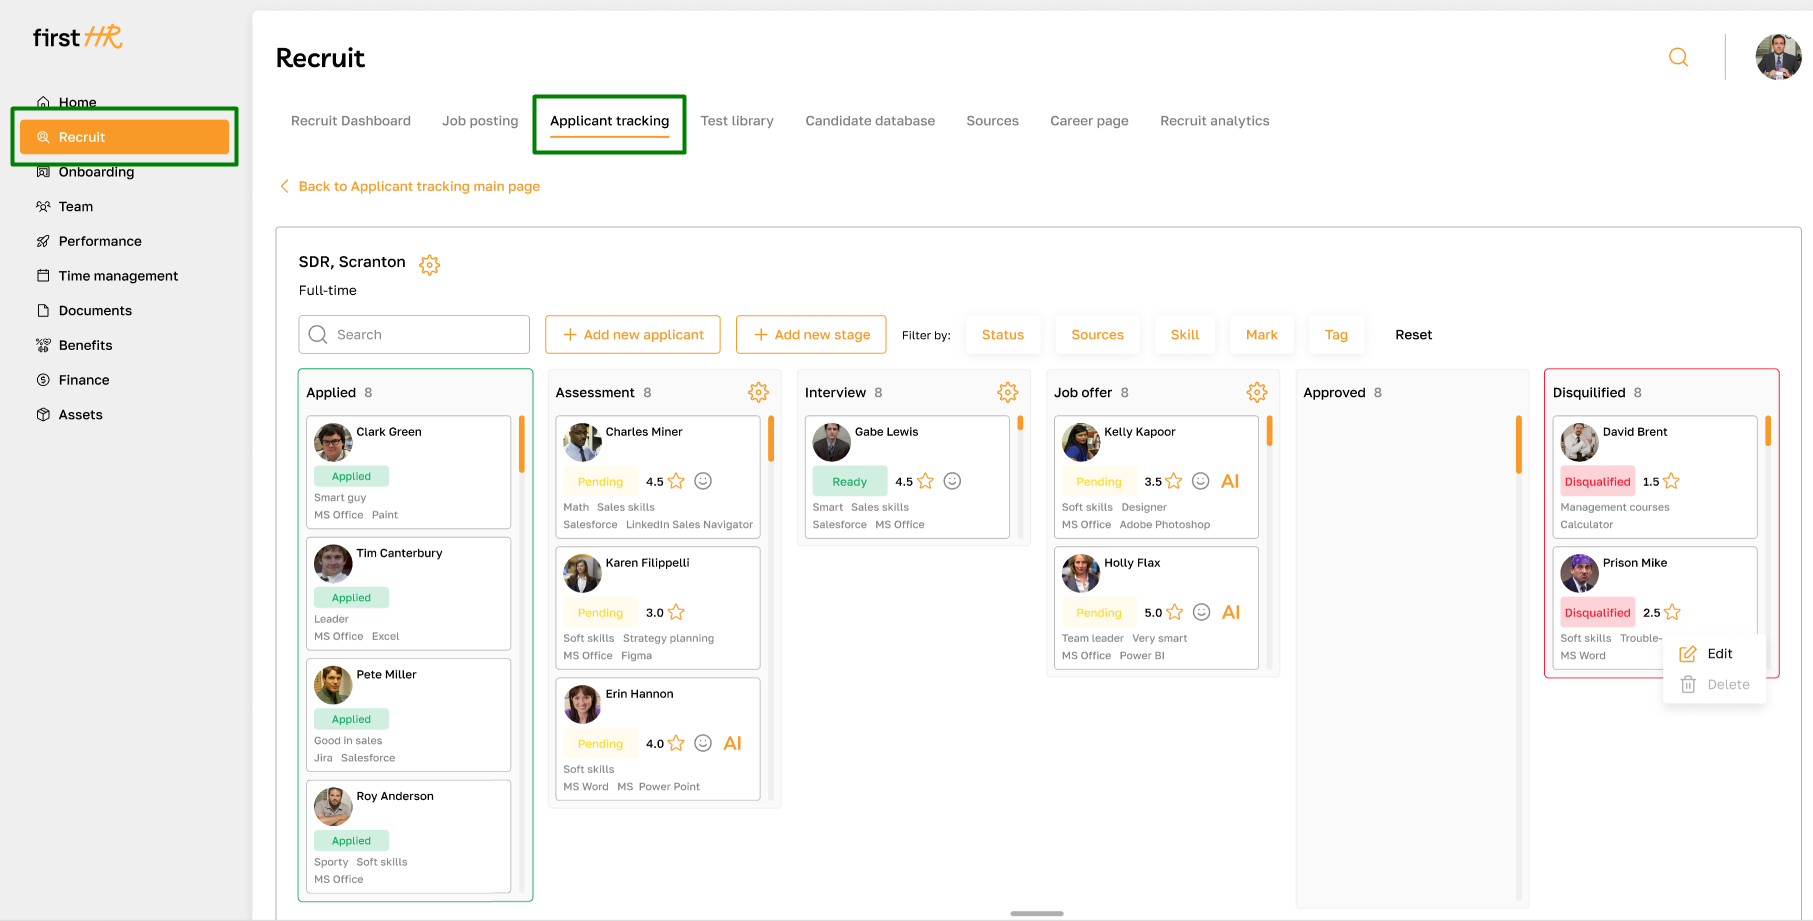
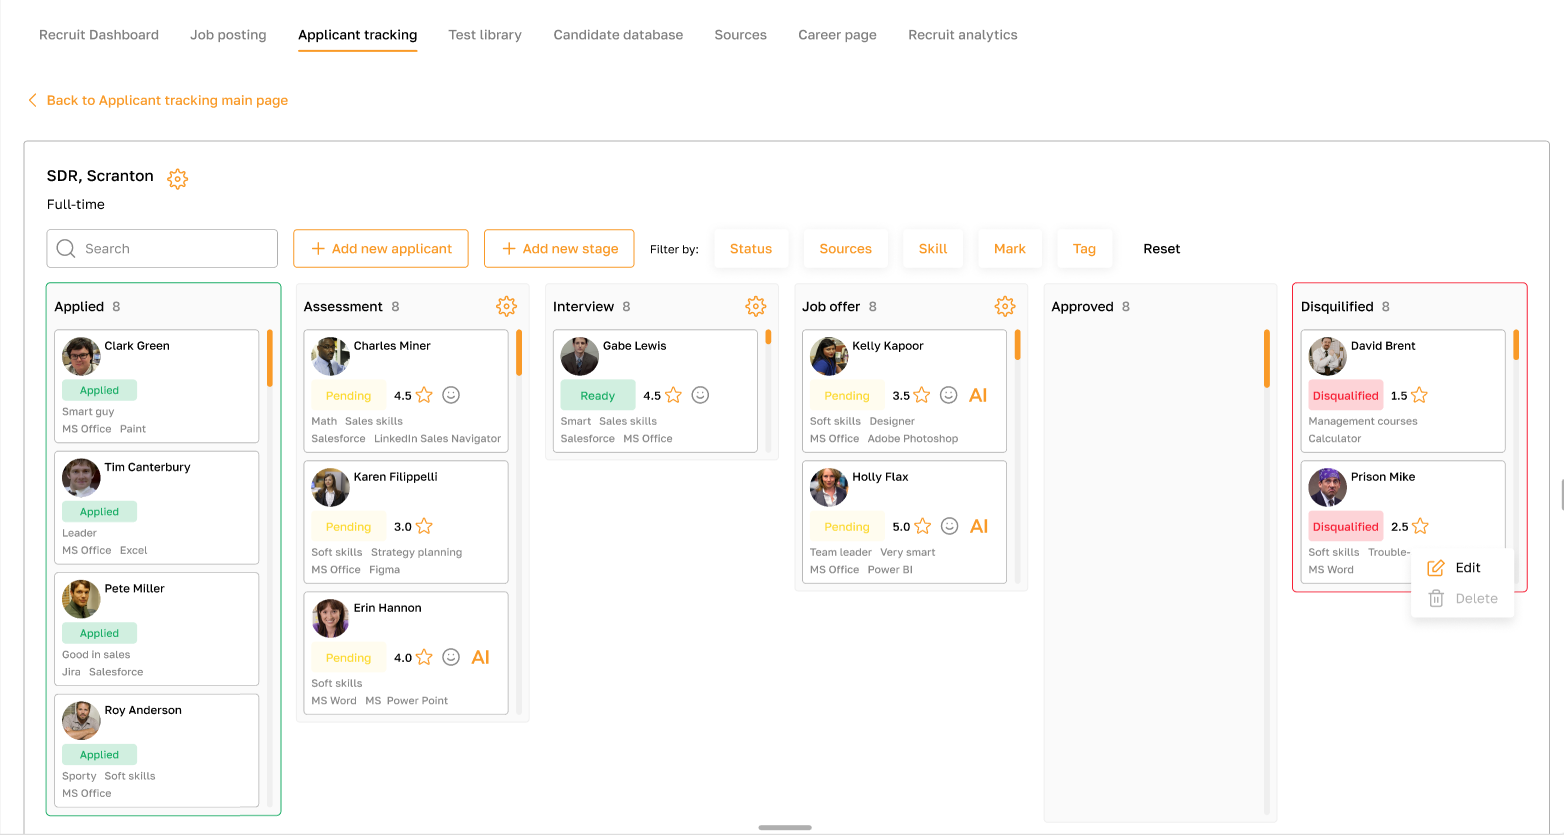
The pipeline represents a Kanban board with stages for candidate selection. Some stages remain unchanged: the first stage is "Applied," and the others are "Approved" and "Disqualified." The latter is intended to store disqualified candidates.
Candidates can be moved simply by dragging their cards between columns or through the candidate's profile.
The candidate card contains the following information: name, photo, tags, markers, and status. Additionally, some candidates display an AI marker, which appears only for those who have successfully passed the AI analysis. This marker indicates that the candidate meets the job requirements.
Connecting Pipeline to Vacancy
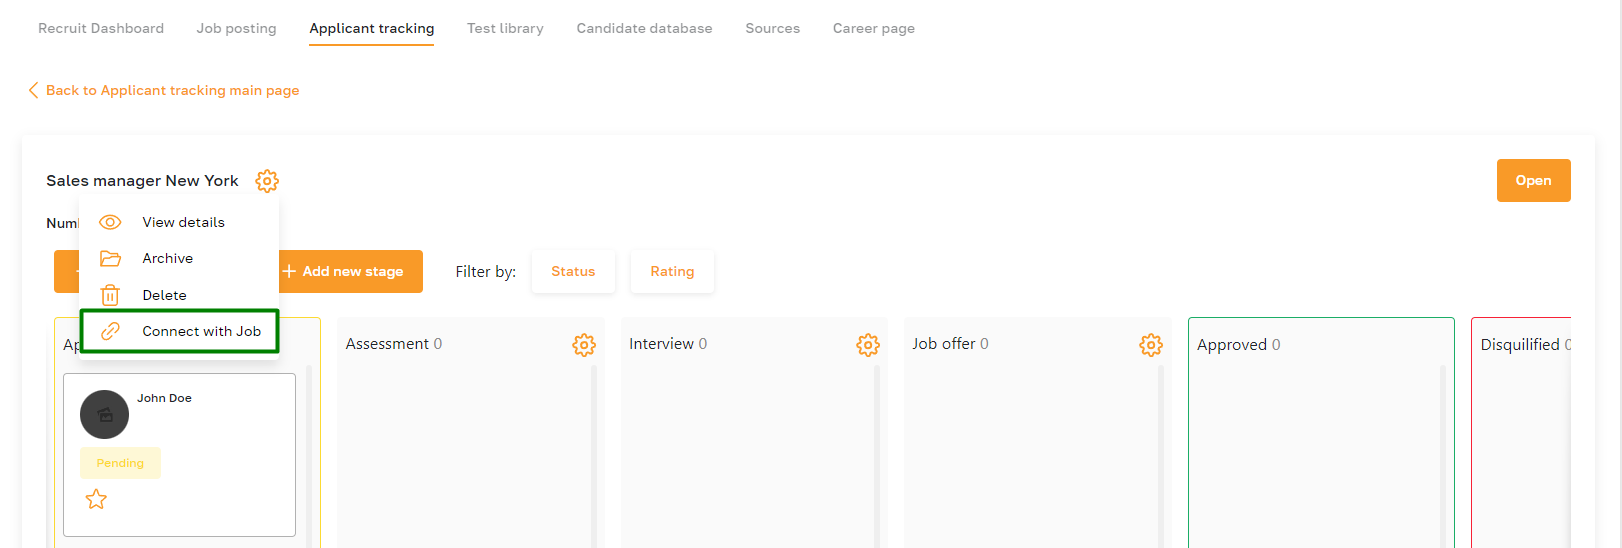
Open the relevant pipeline to link a pipeline to a specific vacancy published on an external platform.
Then, click on the highlighted icon and select the appropriate option from the list.
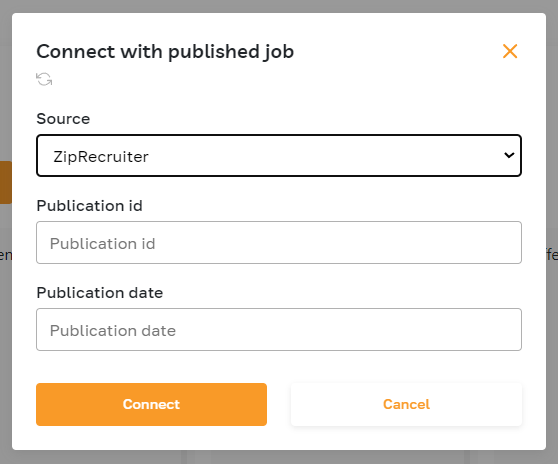
Please note that each platform has its own methods of integration. In some cases, synchronization settings may be required first. For more information about integrations, please refer to this article.
Adding a New Stage
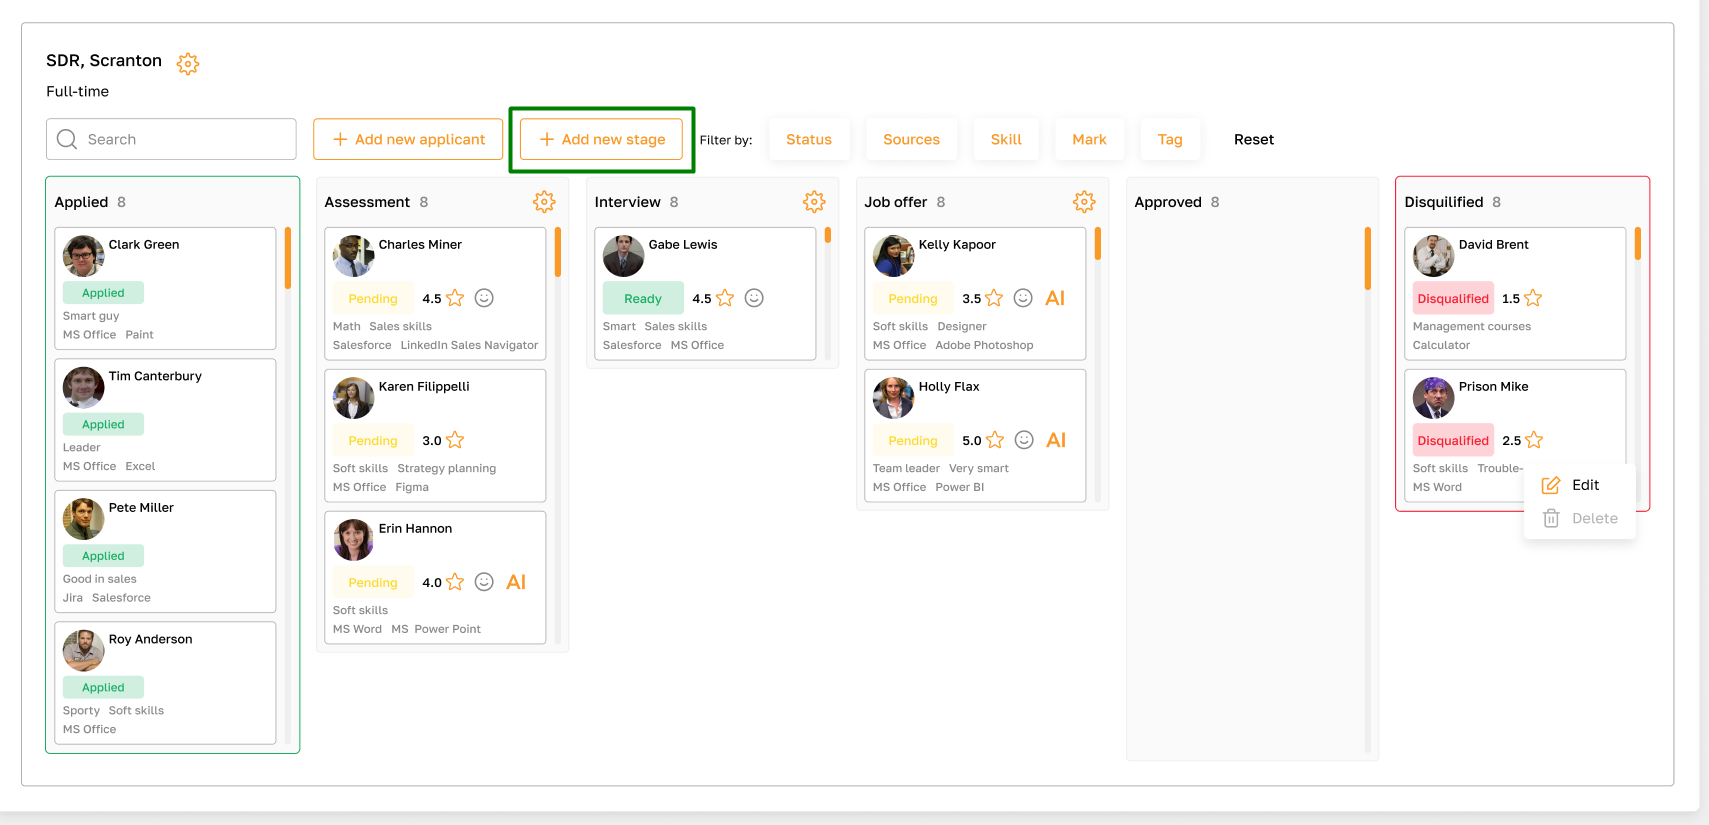
To add a stage, click the Add new stage button. Then, enter the stage's name and confirm the action.
Editing and Deleting Stages
You can delete and edit stages using the highlighted buttons.

Adding a New Candidate
Please refer to this article for detailed information about adding new applicants.
Candidate Profile Overview
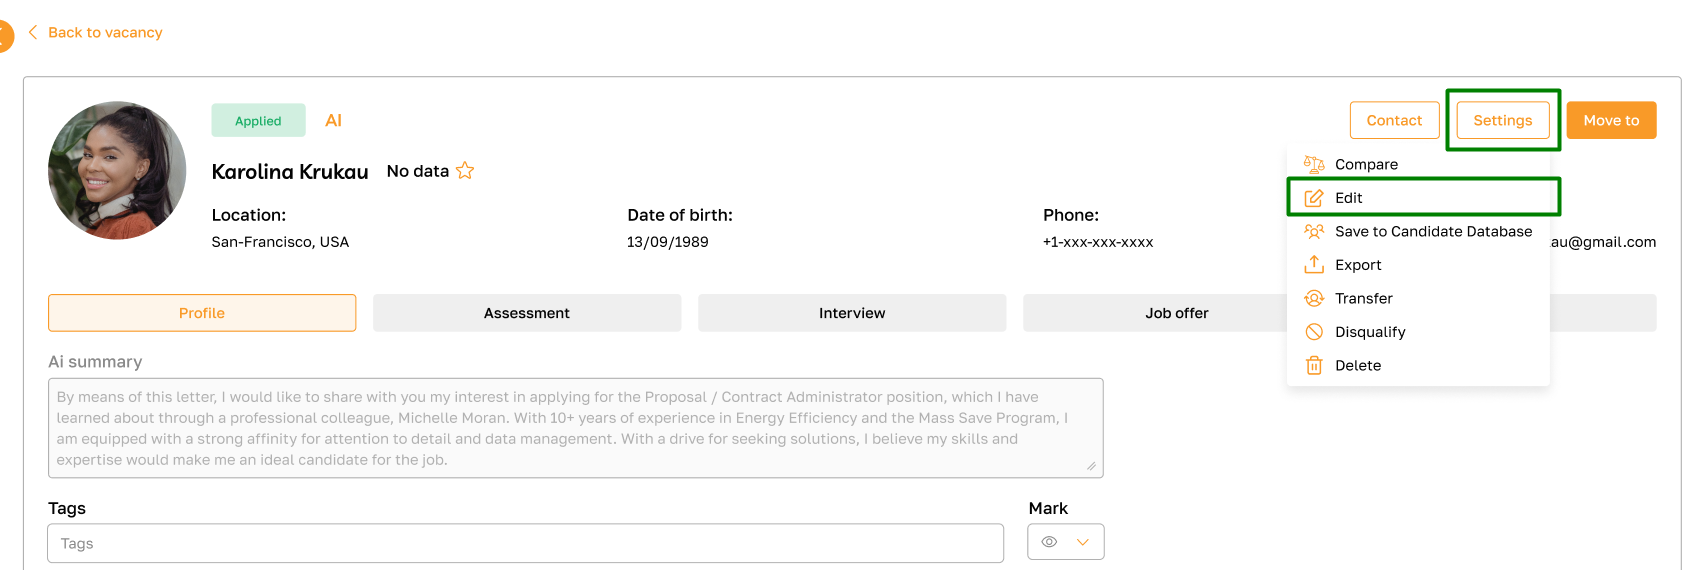
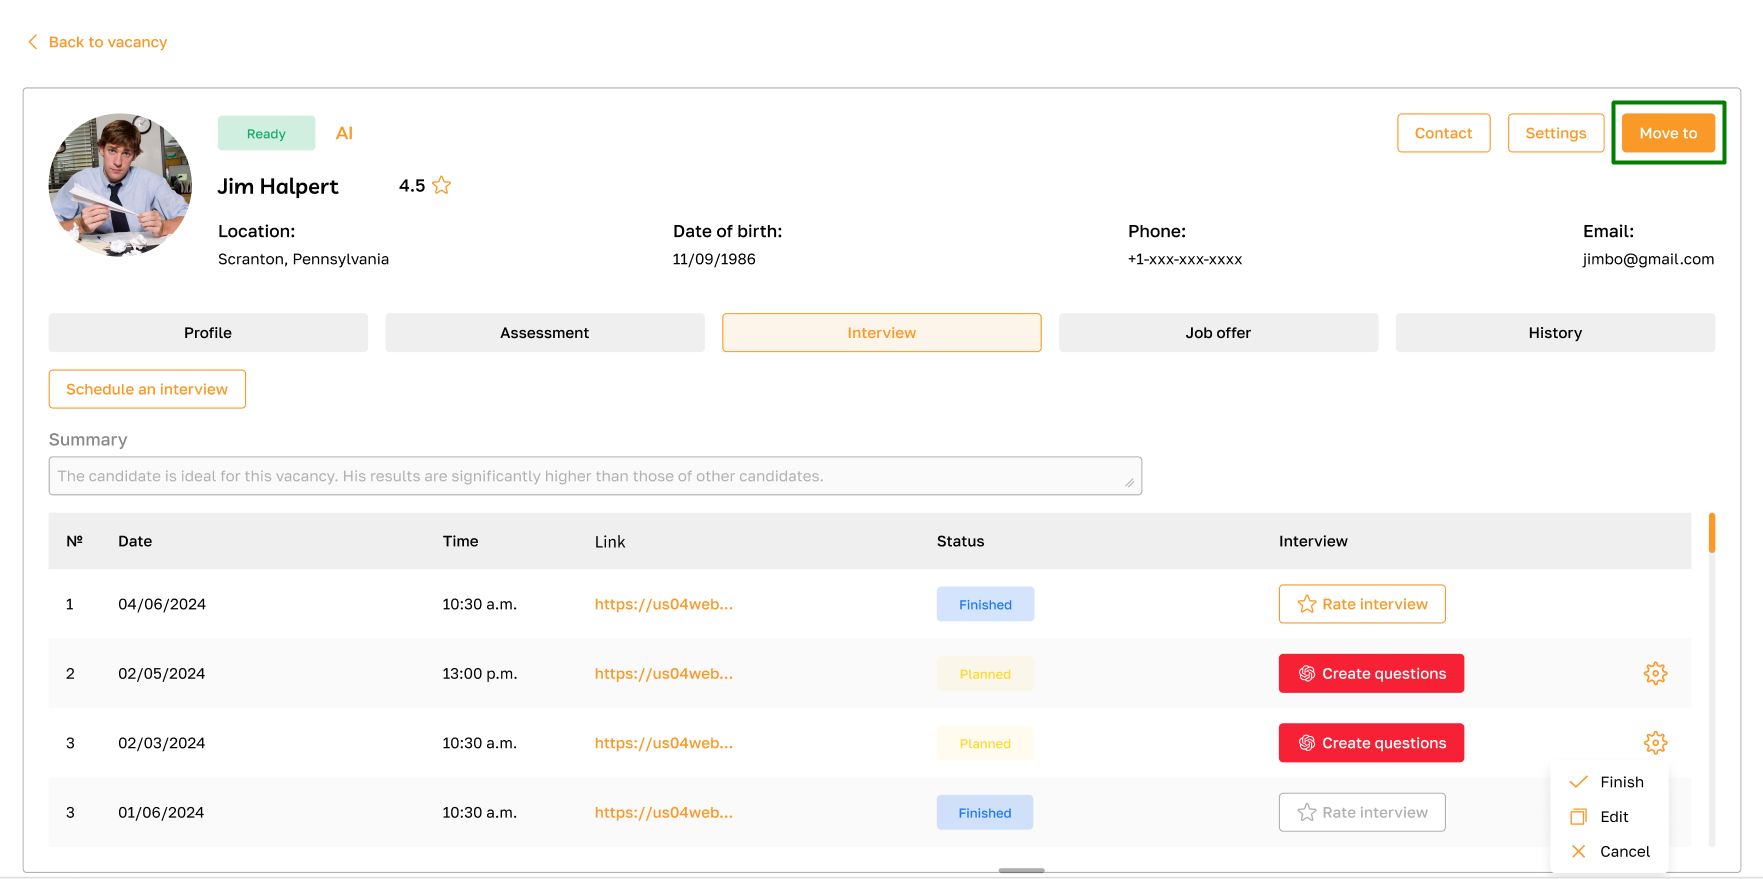
The candidate profile consists of a profile header and tabs: Profile, Assessment, Interview, Job Offer, and History.
The profile header provides basic information about the candidate and key functions.
Moving to another stage
To move a candidate, click the "Move to" button and select the desired stage.
Profile editing
To edit candidate data, click the "Settings" button and choose the appropriate option.
In the opened window, make the necessary changes and save them.
Saving the candidate to the Candidate Database
To keep the candidate's contact, admins can save them in the candidate database for future vacancies. To do this, click the "Settings" button and choose the appropriate option.

Candidate export
To download a candidate's information file to your device, click the "Settings" button and choose the appropriate option.

Moving a candidate to another vacancy
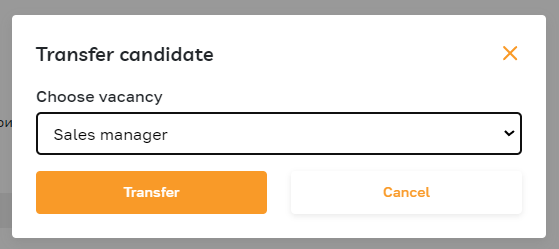
Admins can move candidates between vacancies. To do this, click the "Settings" button and choose the appropriate option.
Select the desired vacancy and confirm the action.
Disqualification of a candidate
If a candidate is not suitable for the open position, administrators can disqualify them. To do this, click the "Settings" button and choose the appropriate option. The candidate will then be moved to the "Disqualified" column, and the system will email the candidate a notification.

Candidate restoration
You can restore disqualified candidates. To do this, click the "Settings" button and choose the appropriate option. The candidate's profile will be restored, and the system will notify the candidate.

Deleting a candidate
To delete a disqualified candidate, click the "Settings" button and choose the appropriate option.
Please note that you cannot delete active candidates.

Candidate comparison
Admins can compare two or more candidates. To do this, click the "Settings" button and choose the appropriate option.
Select the candidates for comparison and click the "Compare" button.
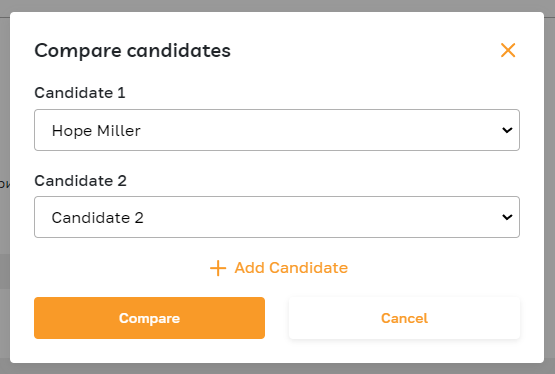
Here, you can view and compare the basic data of the selected candidates. Additionally, you can delete candidates and add new ones for comparison.
Communicating with candidate
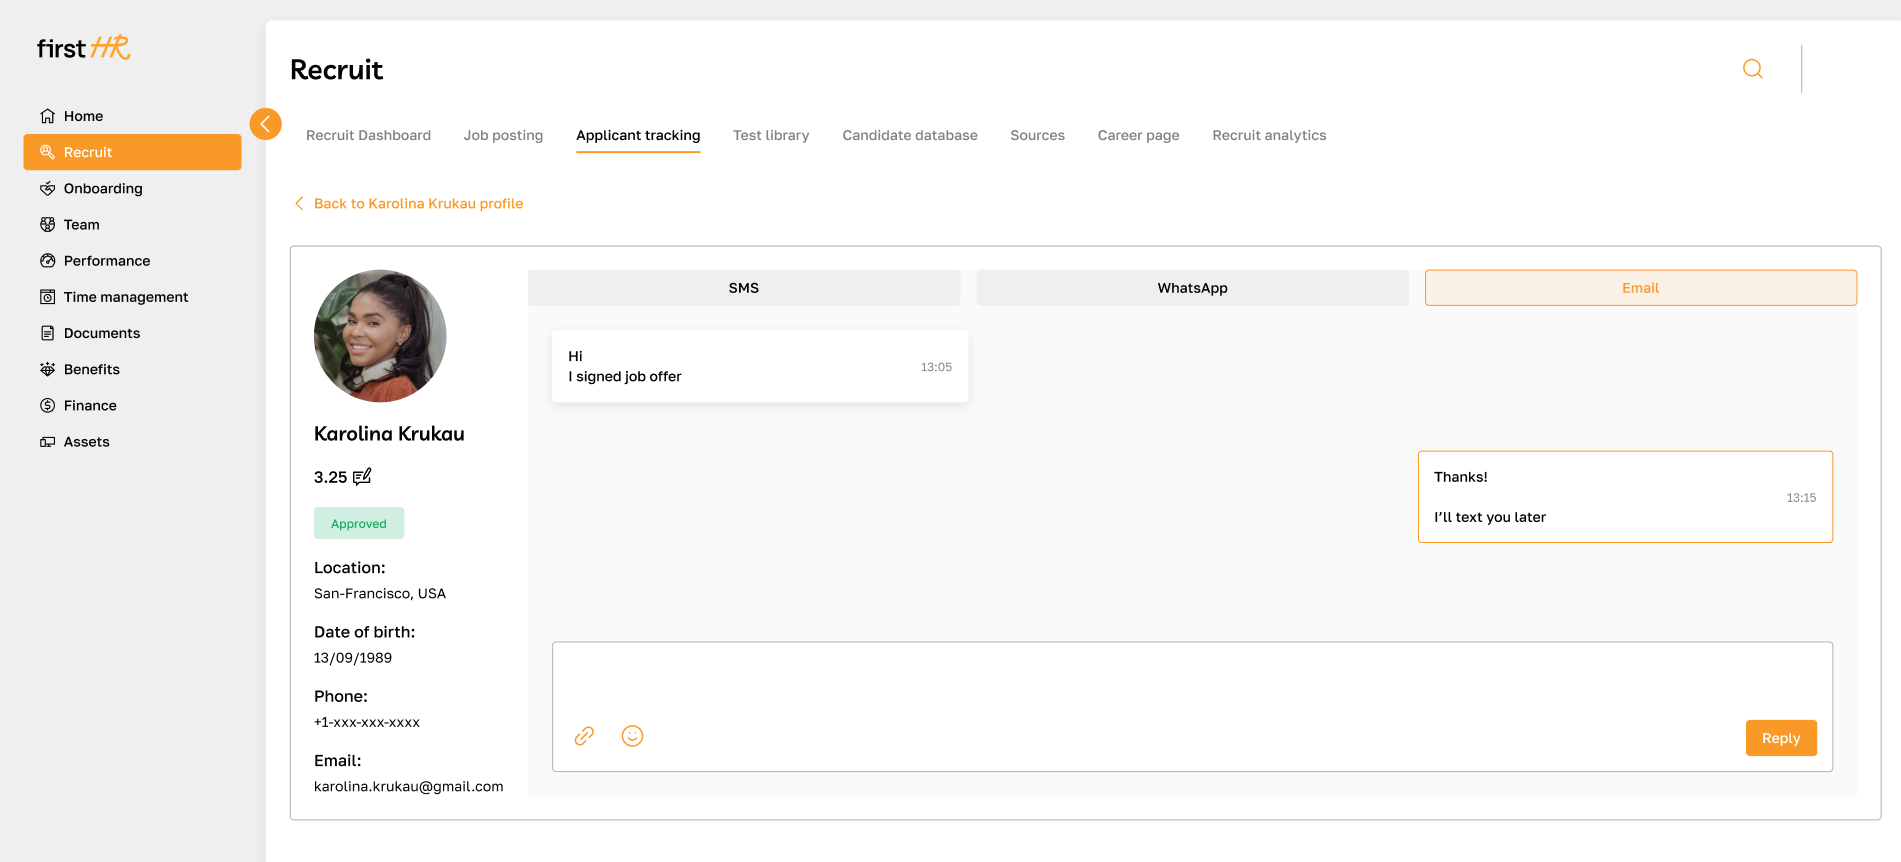
To start communicating, click the “Contact” button on the candidate's profile.
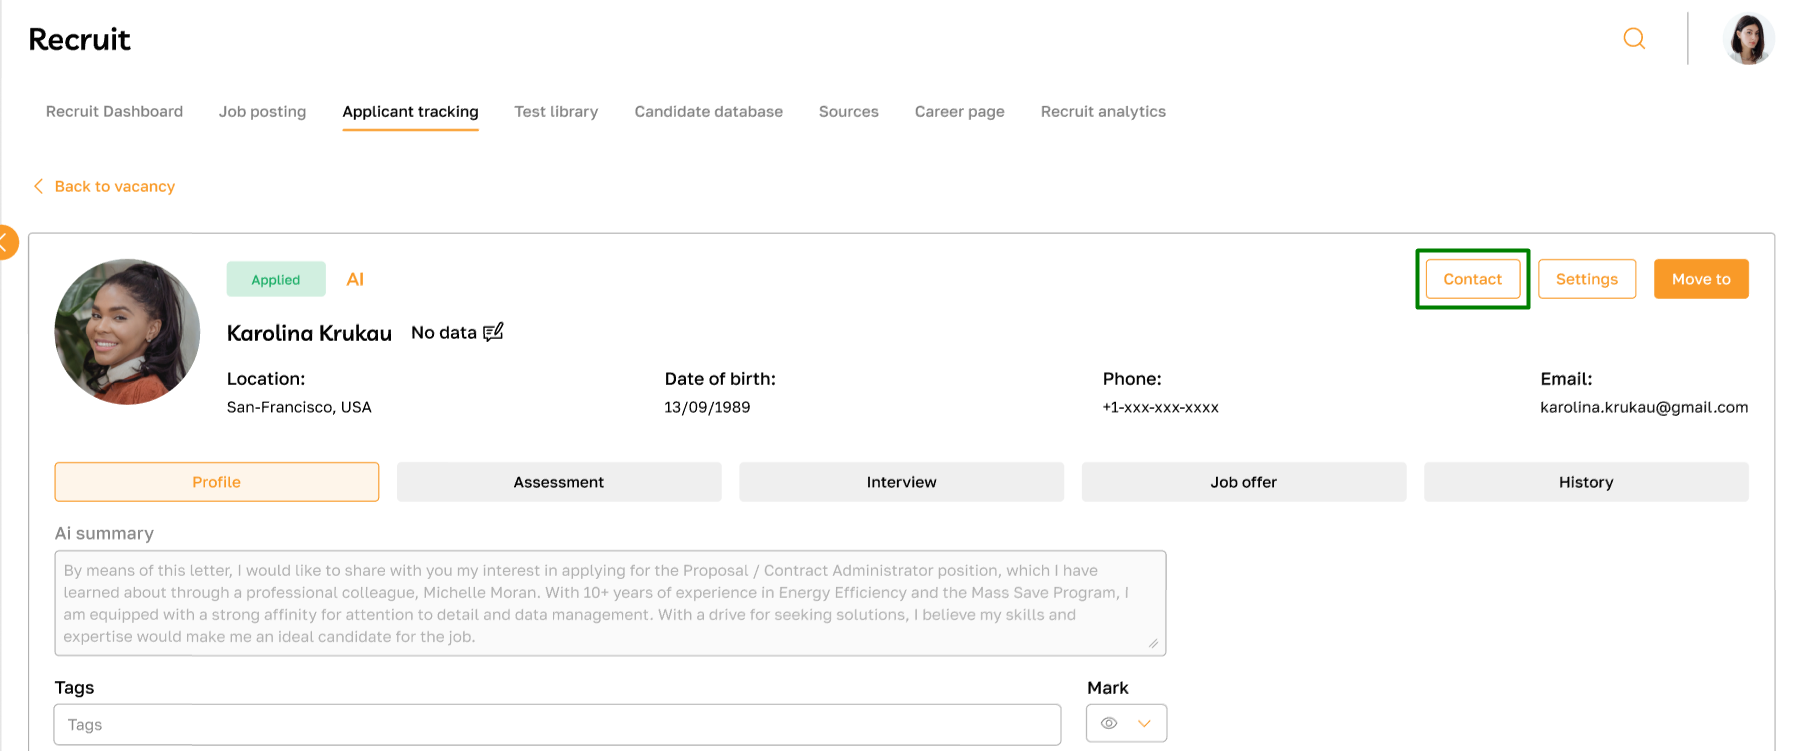
This section lets you easily communicate with candidates via email, SMS, or WhatsApp. Choose the method that best suits your preferences and the candidate's comfort to ensure effective communication throughout the hiring process.
Please note that the admin must configure the integration before communication can begin. The “Integration” section lists available platforms.
Reviewing Candidate Profile Tabs
The candidate profile consists of 5 tabs. For detailed information about each tab, please refer to the corresponding articles:

