First Steps for the Administrator Account
Welcome to the First Steps guide for helping new users through the initial setup of the FirstHR platform, ensuring a smooth start and optimal use of its features. This page provides a step-by-step guide to help you get started efficiently and make the most out of the platform.
Step 1: Invite your team
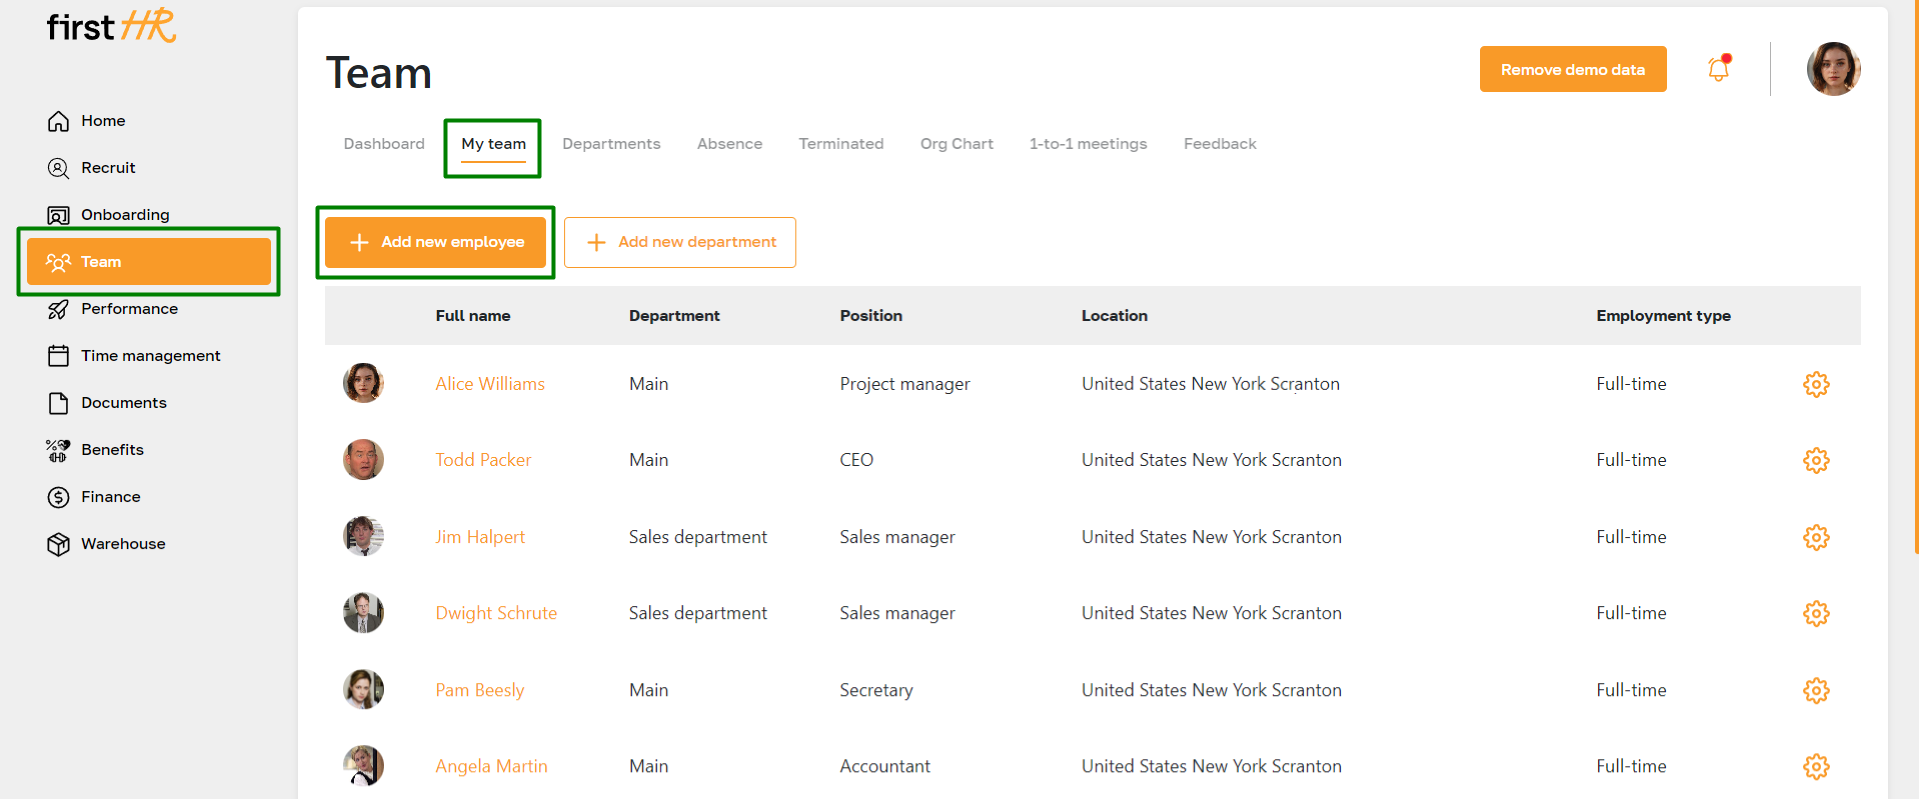
Invite your team members to join the FirstHR platform by navigating to the "My Team" section. You can add employees from scratch, send invitations, add as approved candidates, or import from the Candidate database. This function is located in the "Team" module, under the "My team" section.
For more details on this step, please read this article.
Step 2: Set up your profile
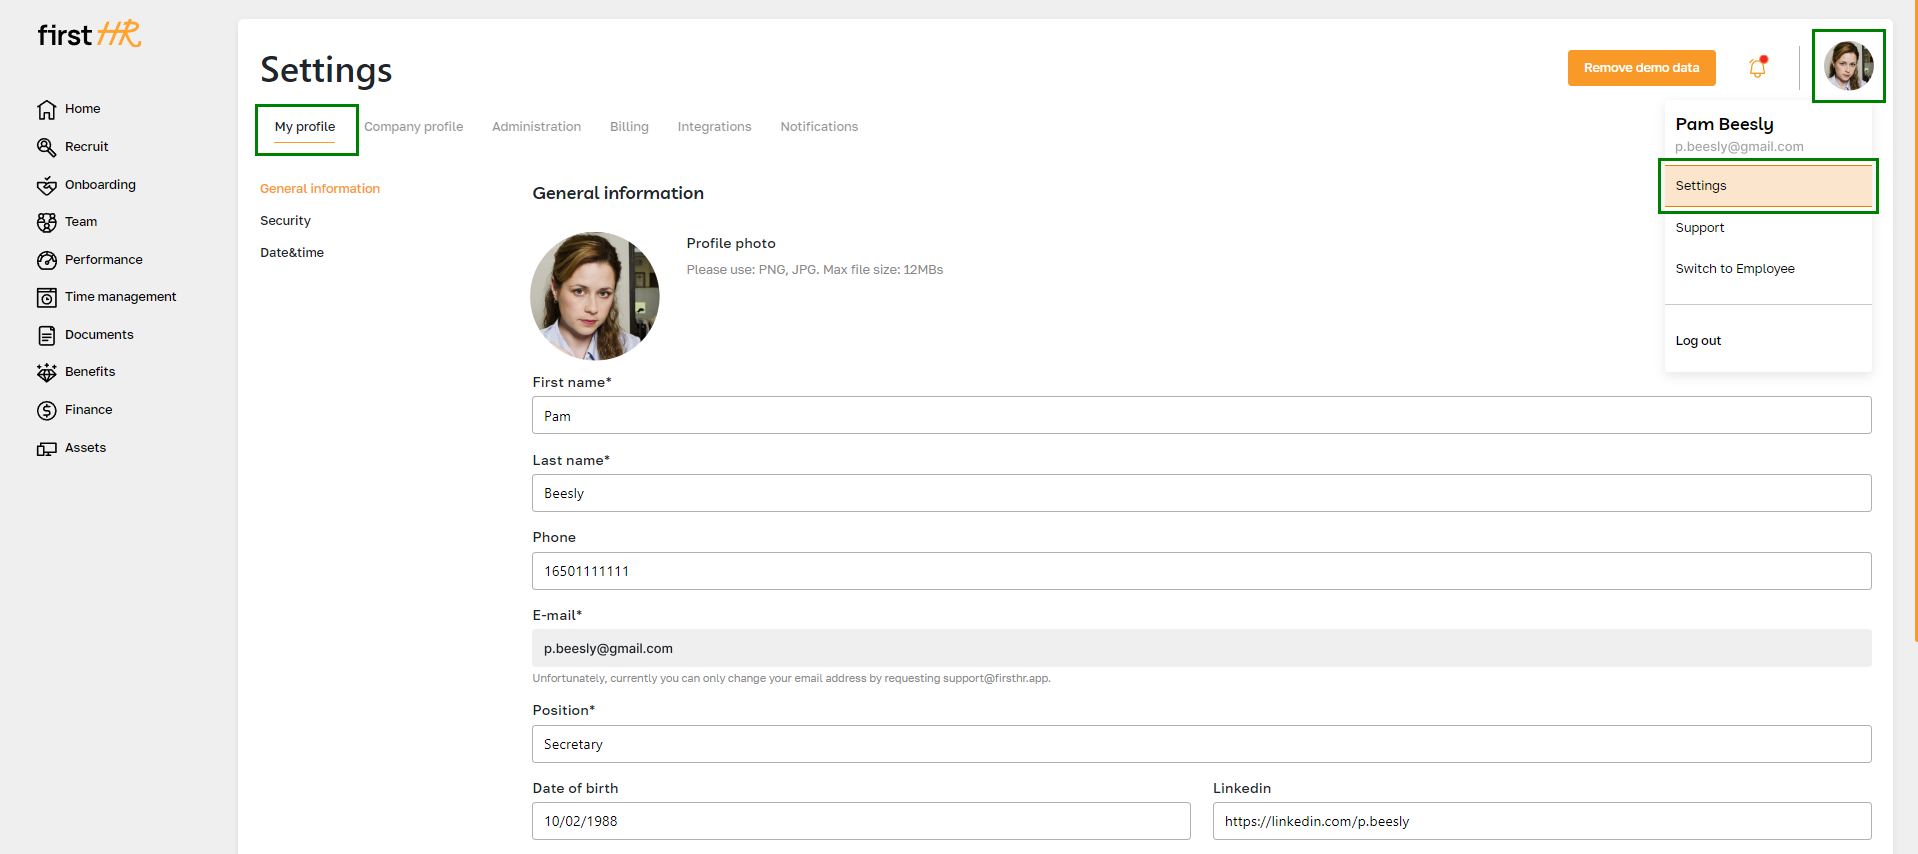
Complete your profile setup by going to the "My Profile" section under "Settings". Fill in your personal information, upload a profile picture, and ensure all details are accurate.
For more details on this step, please read this article.
Step 3: Set up your integrations
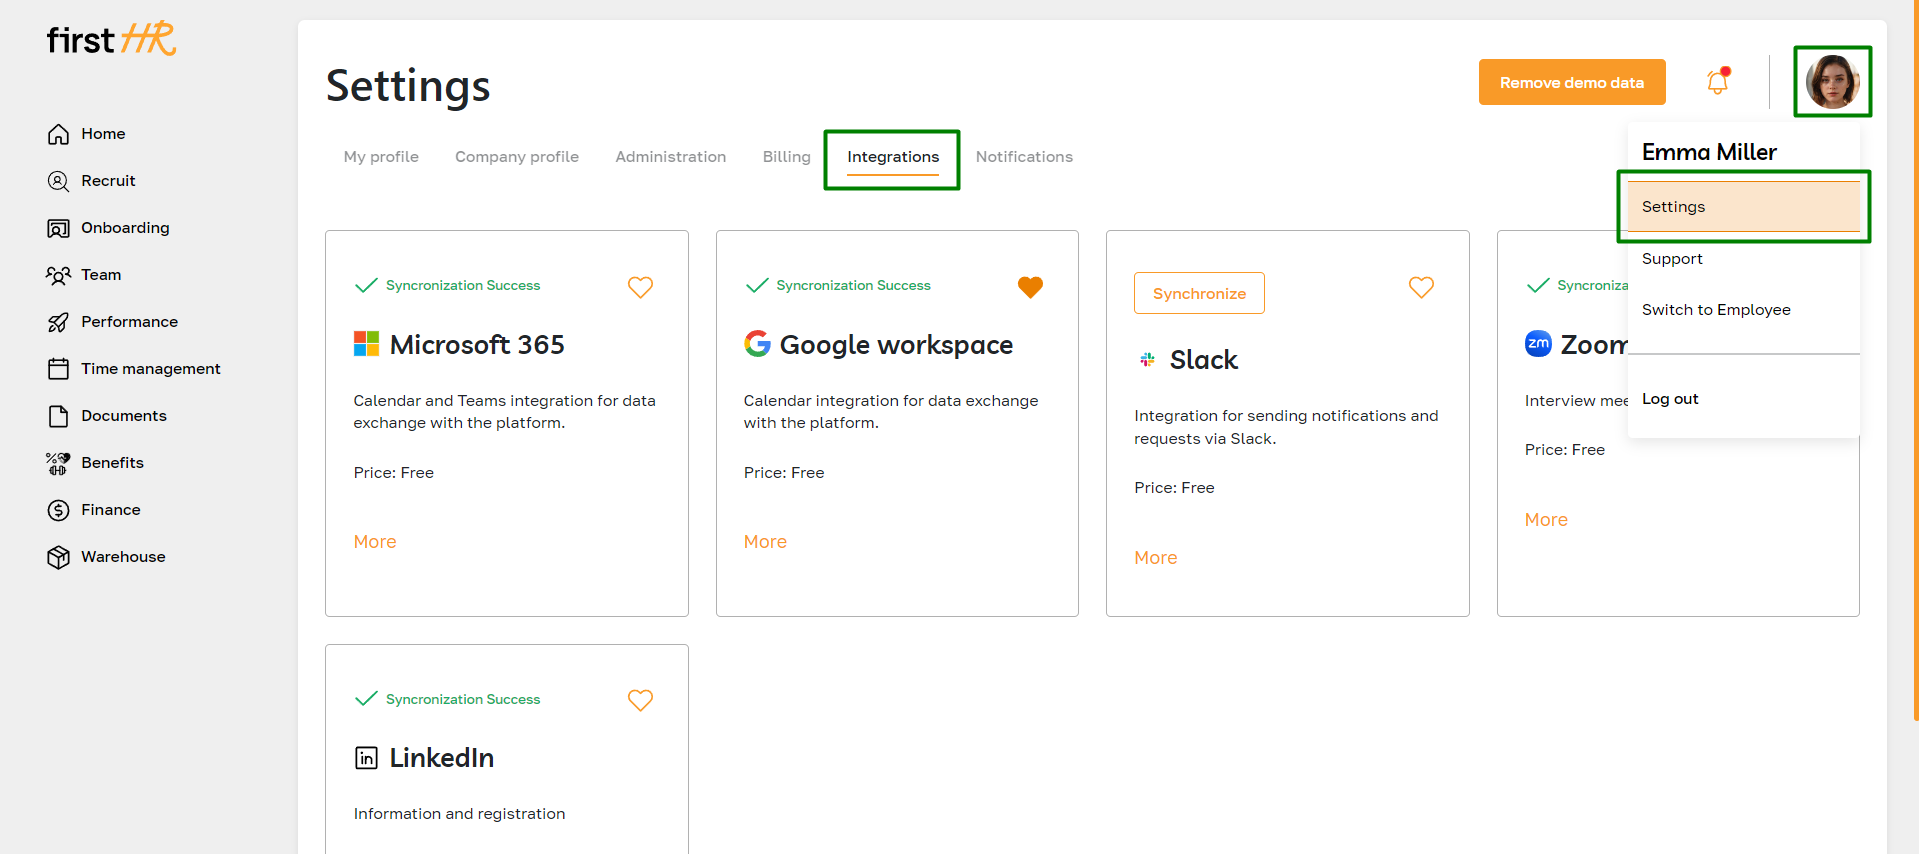
Integrate essential tools and services with the platform by accessing the "Integrations" section under "Settings". Connect your calendar, social networks, and other applications to streamline workflows.
For more details on this step, please read this article.
Step 4: Grant permissions to administrators
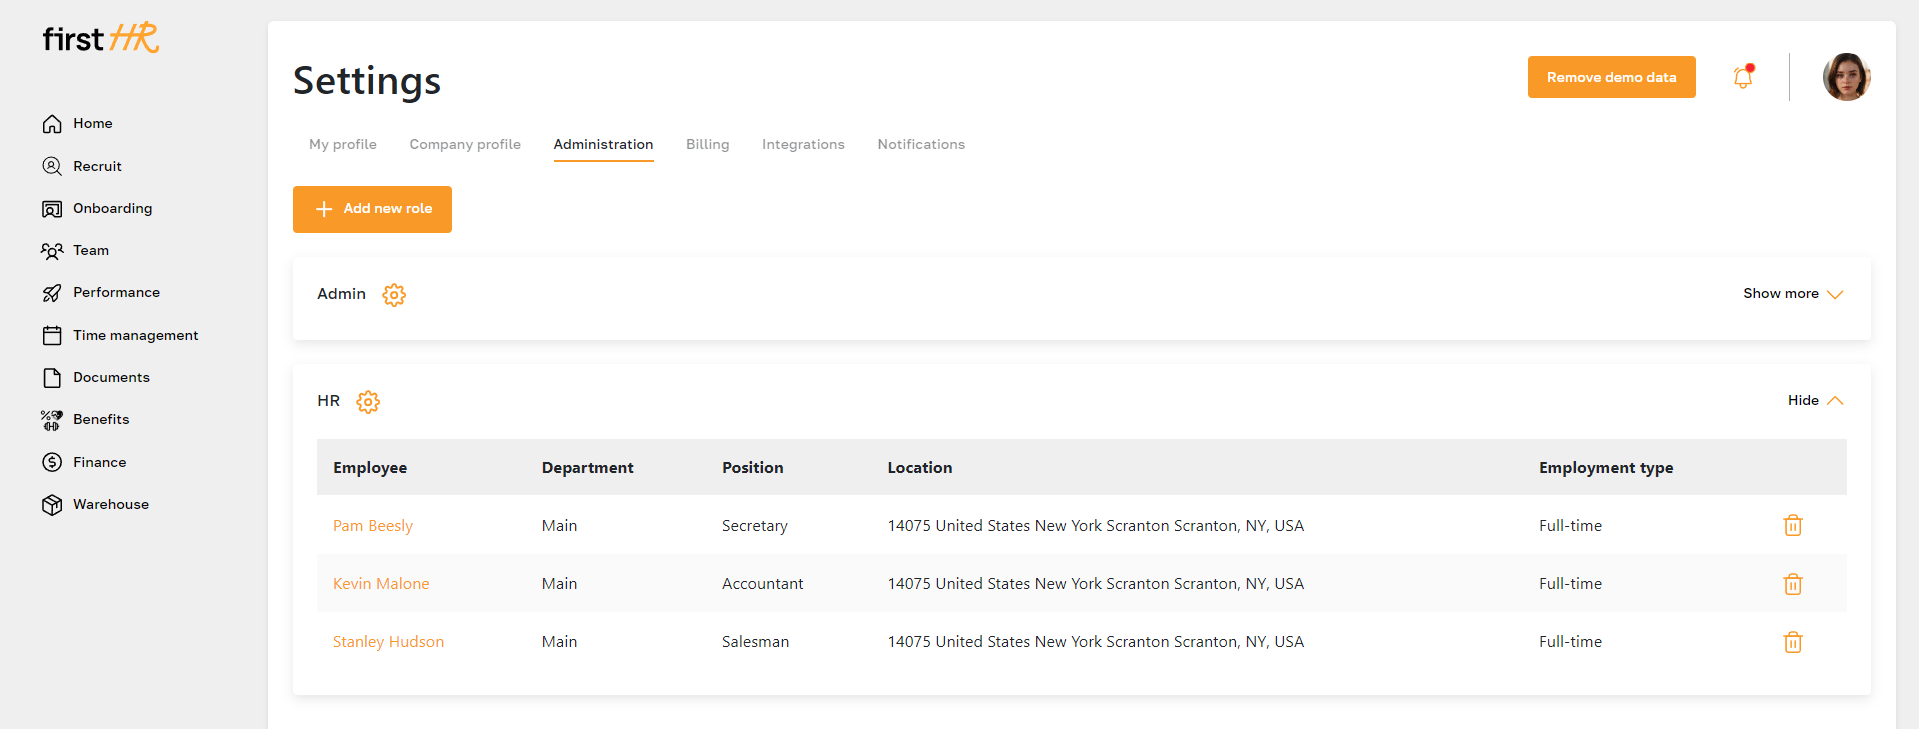
Assign administrative roles and permissions by navigating to the "Settings" section and selecting "Administration". Here, you can grant main admin rights, and create custom roles for flexible permissions.
For more details on this step, please read this article.
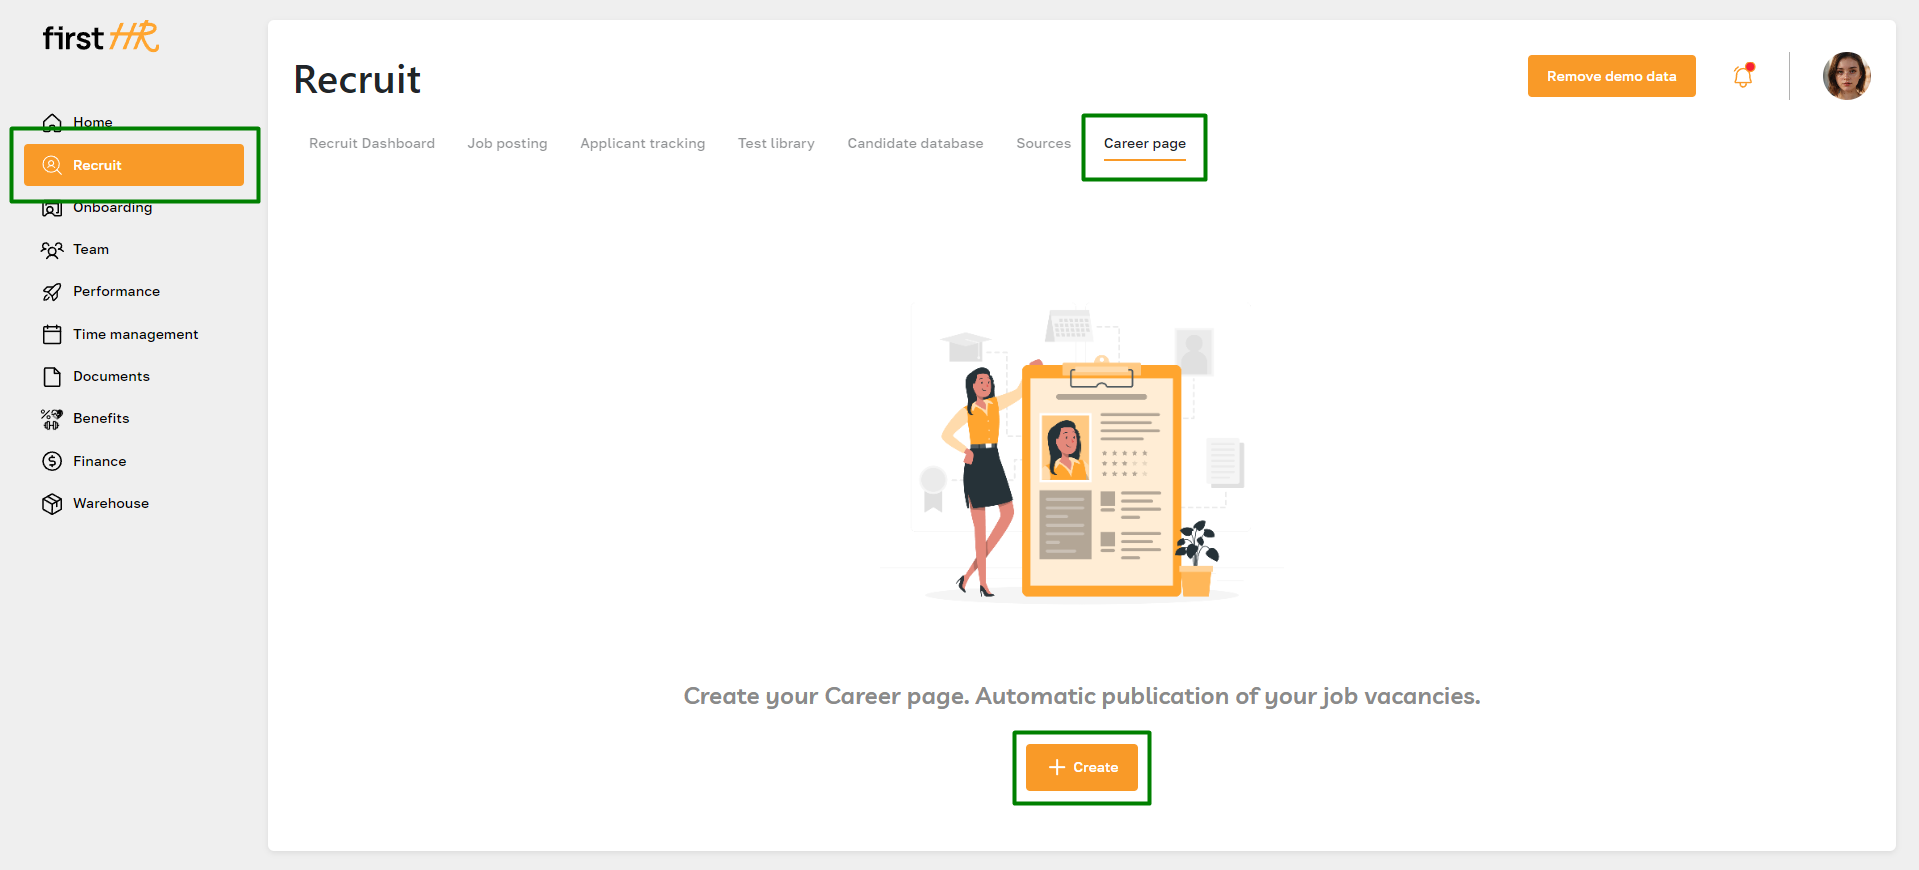
Step 5: Set up your Career Page
Customize your company’s career page in the "Recruit" section under "Career Page". Add your company’s branding, description, contacts, and other relevant information to attract potential candidates.
For more details on this step, please read this article.
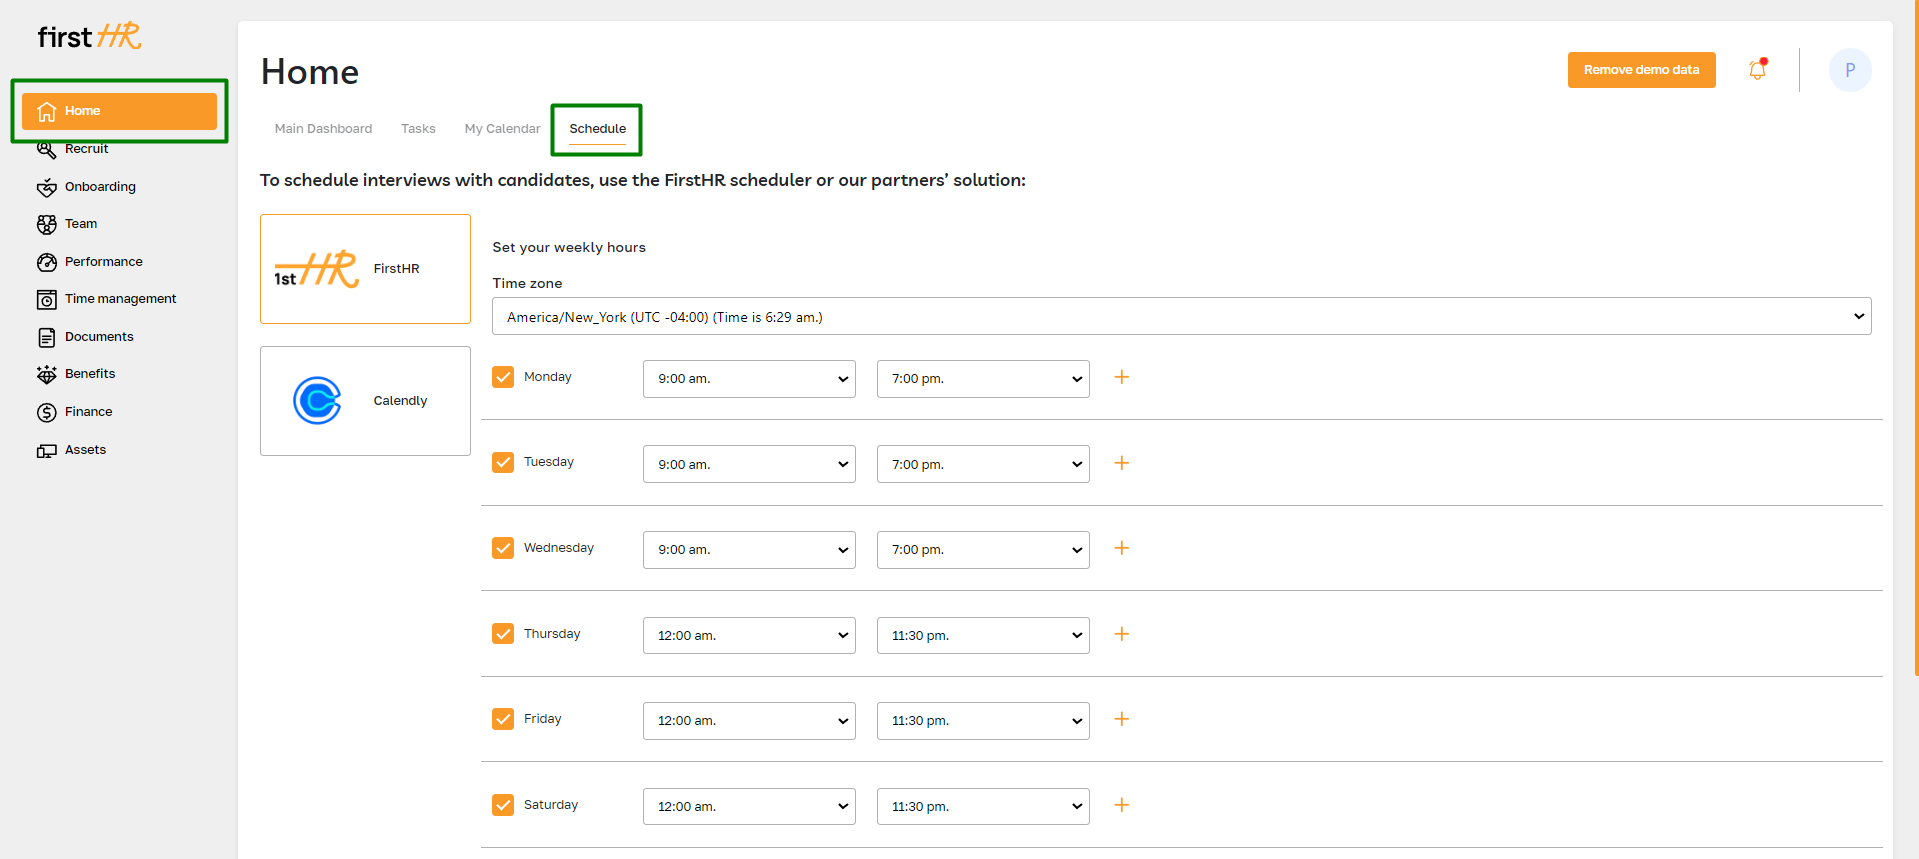
Step 6: Set up your Schedule
Configure your schedule for candidate calls by going to the "Home" module and selecting the "Schedule" section. Set available time slots for calls with candidates and other scheduling preferences.
For more details on this step, please read this article.
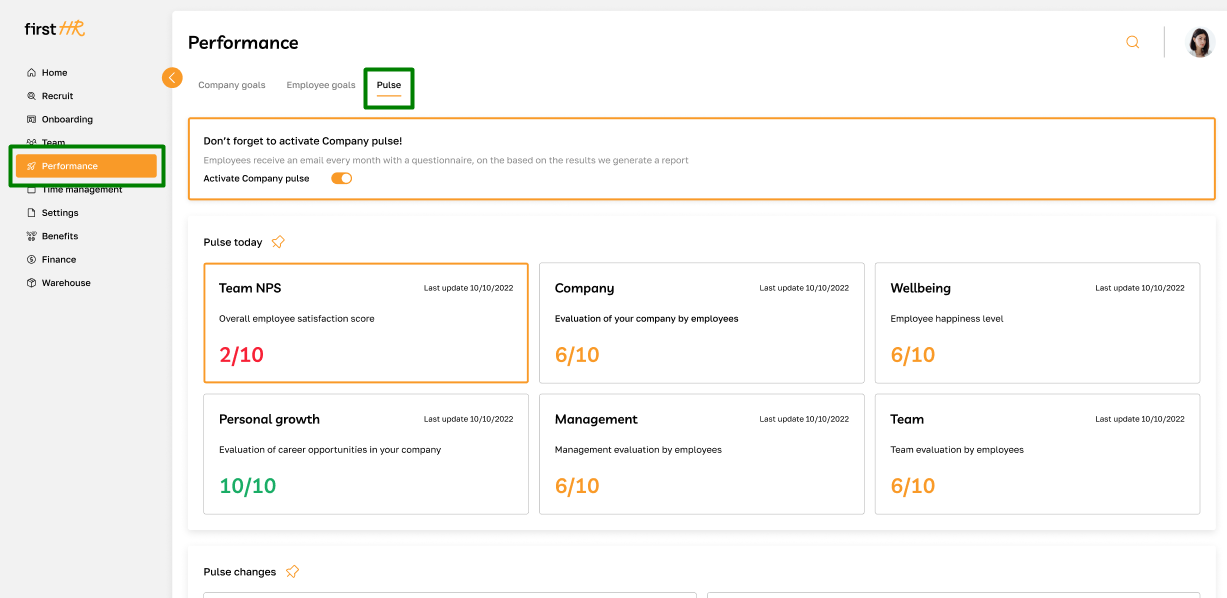
Step 7: Turn on the Company Pulse
Activate the Company Pulse feature in the "Performance" section to start gathering regular feedback and insights from your employees.
For more details on this step, please read this article.
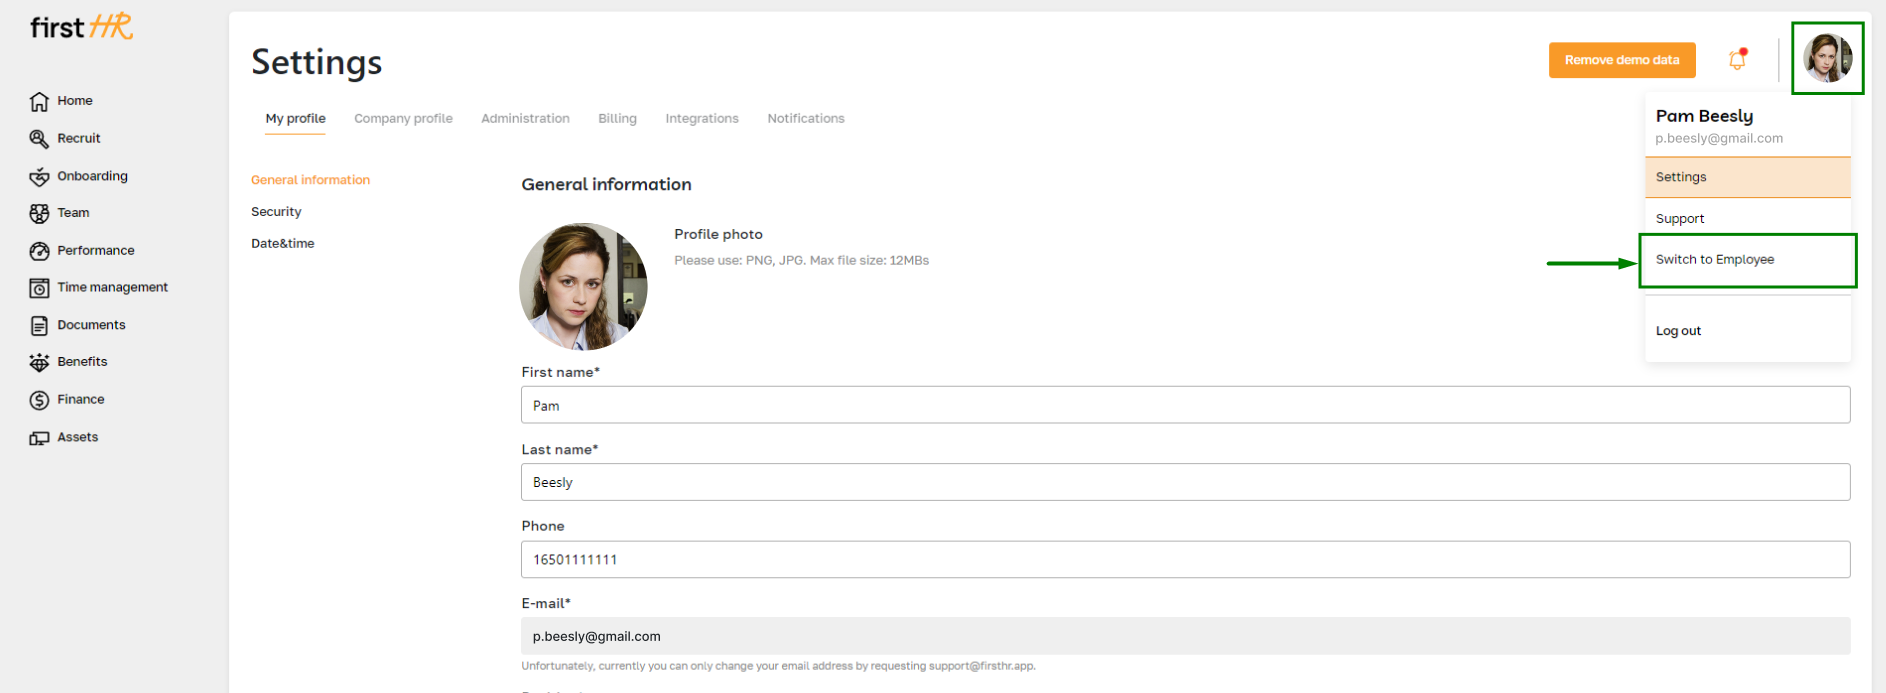
Step 8: Check your Employee Profile
Review your Employee account by clicking on your avatar and selecting the "Switch to Employee" option. Browse through all sections and complete the initial setup.
For more details on employee accounts, please visit this page.
Step 9: Choose your plan
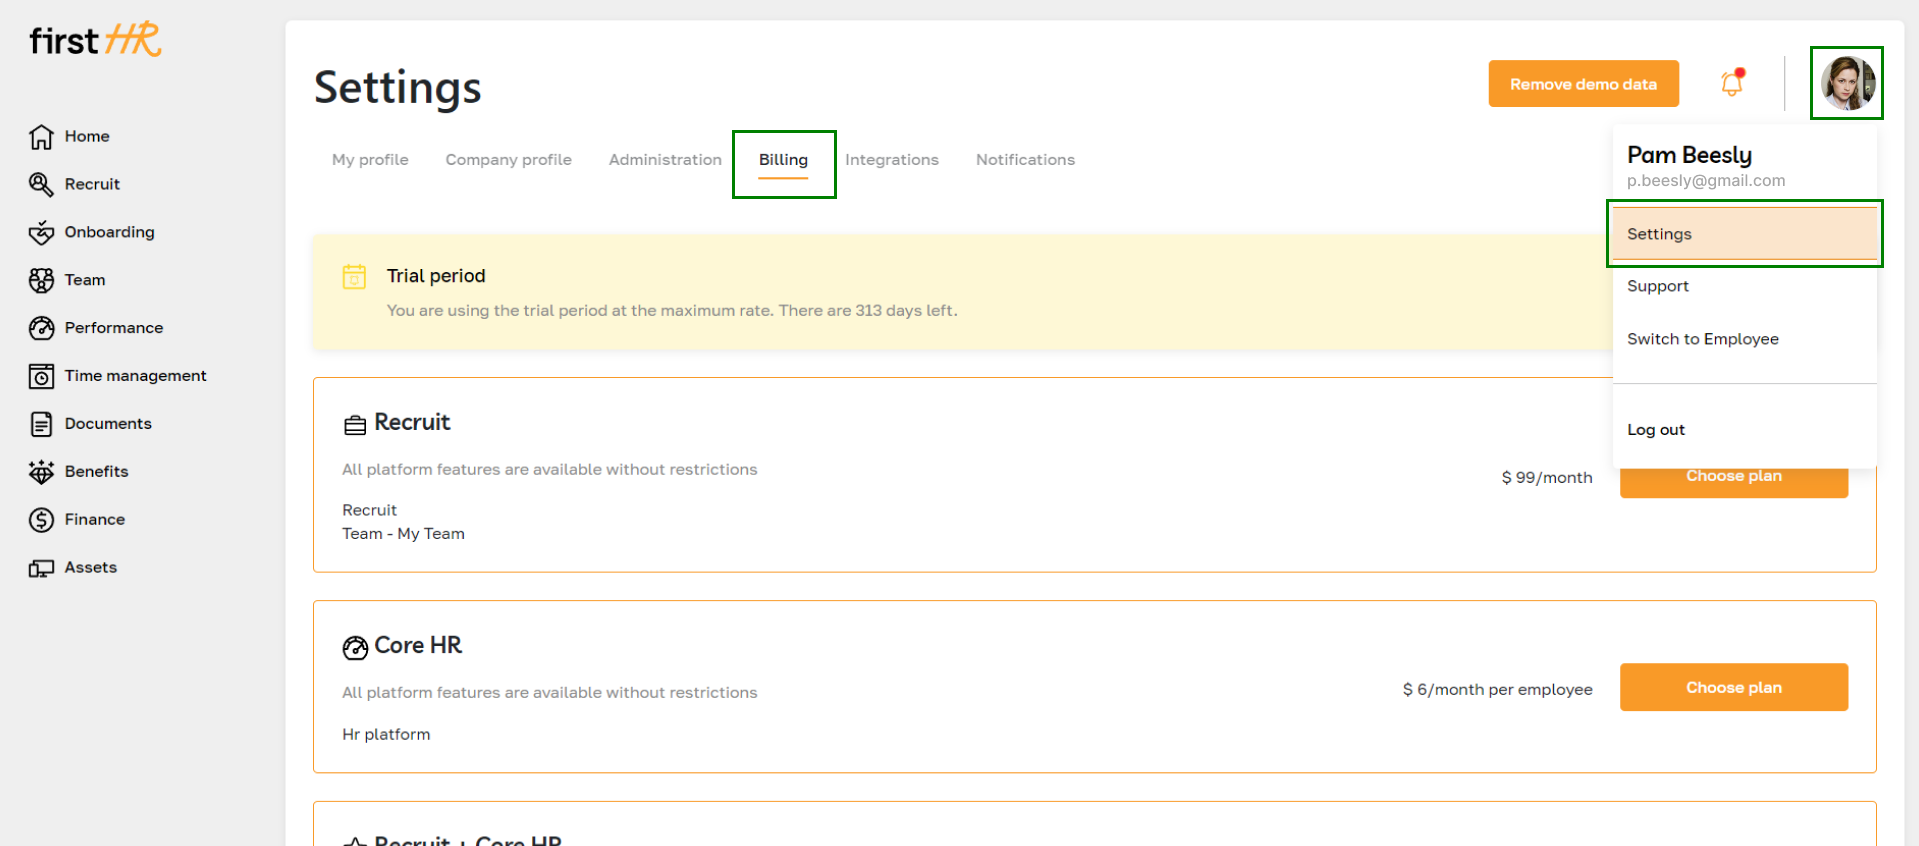
Select the appropriate subscription plan for your company by visiting the "Billing" section under "Settings". Compare available plans and choose the one that best fits your needs.
For more details on this step, please read this article.
If you have any questions about the features or account setup, you can find answers in our Help Center or check our FAQ section. For further assistance, feel free to reach out to our technical support team. We are here to help you get the most out of your FirstHR platform experience.
